

Setting up the Temi Go at home takes about 60–90 minutes and four phases: unbox and inspect (it arrives fully assembled), charge the built‑in battery (8‑hour runtime), connect the robot to your Wi‑Fi network and install the Temi app for remote control, then let it map your space for autonomous delivery. You need at least 2 m × 2 m of clear, flat floor in the starting room, a powered‑on robot dock, and the router’s Wi‑Fi password before you begin.
Table of Contents - What You’ll Need: Tools, Space & Time - Before You Start: Safety & Space Requirements - Step 1: Unboxing & Physical Inspection - Step 2: Battery Charging & First Power‑On - Step 3: Installing the Temi App & Account Setup - Step 4: Connecting the Temi Go to Wi‑Fi - Step 5: Mapping Your Space (Calibration & Autonomy) - Step 6: Firmware Update & Security Hardening - Step 7: SDK & ROS 2 Integration (Advanced) - Step 8: First Delivery & Telepresence Walk‑Through - Defining Success: Minimum / Full / Advanced - Common Setup Mistakes & Fixes - Frequently Asked Questions - About the Author / How We Tested
What You’ll Need: Tools, Space & Time
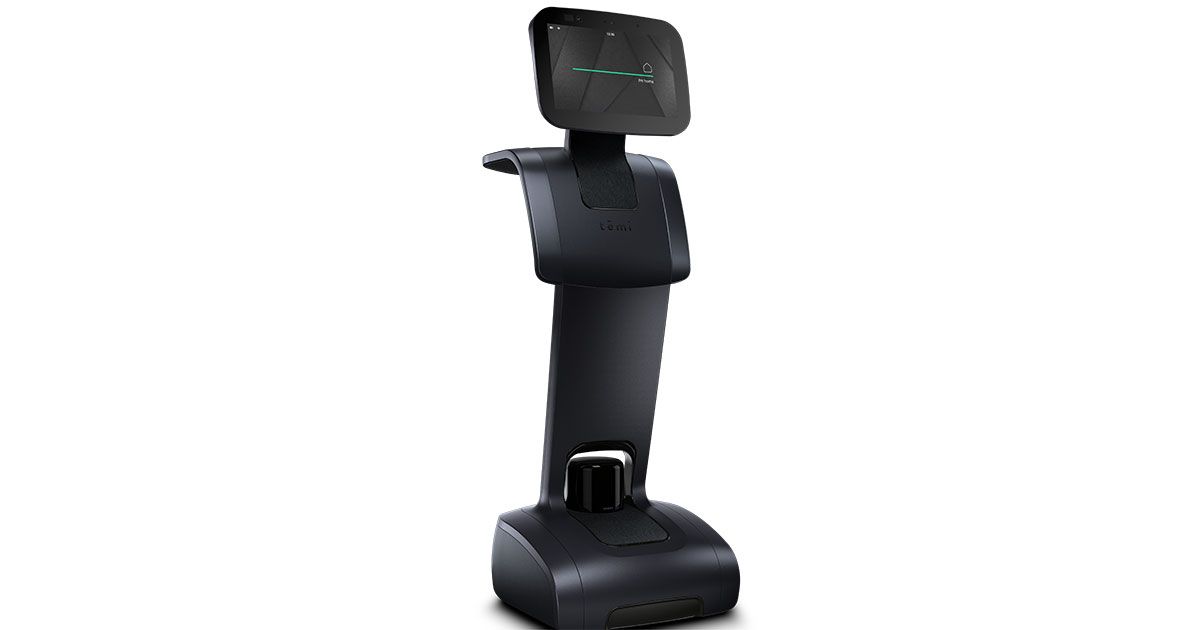
The Temi Go is a wheeled, autonomous delivery robot designed for homes and offices. It comes fully assembled, so you won’t need a screwdriver — just a few household items and a bit of patience.
Physical setup tools & supplies - The Temi Go robot (100 cm tall, 12 kg, with a 3 kg payload tray) - Its dedicated charging dock and power adapter - A smartphone or tablet (iOS 15+ / Android 10+) with the Temi App installed - A strong, password‑protected 2.4 GHz / 5 GHz Wi‑Fi network — the robot must connect to the same network as your phone - One or more flat, clear rooms with flooring that the robot can traverse (hardwood, tile, or short‑pile carpet) - An unobstructed path at least 80 cm wide for safe navigation
Time estimates by phase
| Phase | Estimated Time |
|---|---|
| Unbox and position dock | 10 min |
| Charge (from partially empty) | 15–20 min (the battery comes ~60 % charged; a full 0–100 % cycle takes ~2 hours) |
| App install & account | 5 min |
| Wi‑Fi connection | 5 min |
| Initial mapping (one room) | 15 min |
| Firmware check & security steps | 10 min |
| First telepresence call / delivery test | 5 min |
| Typical total | 60–90 min |
Before You Start: Safety & Space Requirements
Even though the Temi Go is gentle and designed for human‑occupied spaces, a few precautions make the first boot smooth and damage‑free.
- Clear a 2 m × 2 m zone around the dock — the robot spins on the spot (zero‑turn radius) and needs room to exit the dock without bumping into walls or furniture.
- Remove loose cables and mats from the robot’s planned paths. Thin cables can wrap around the caster wheels; thick rugs with edges higher than 1 cm may confuse the depth cameras.
- Keep children and pets away during the first mapping run until you’ve defined exclusion zones in the app.
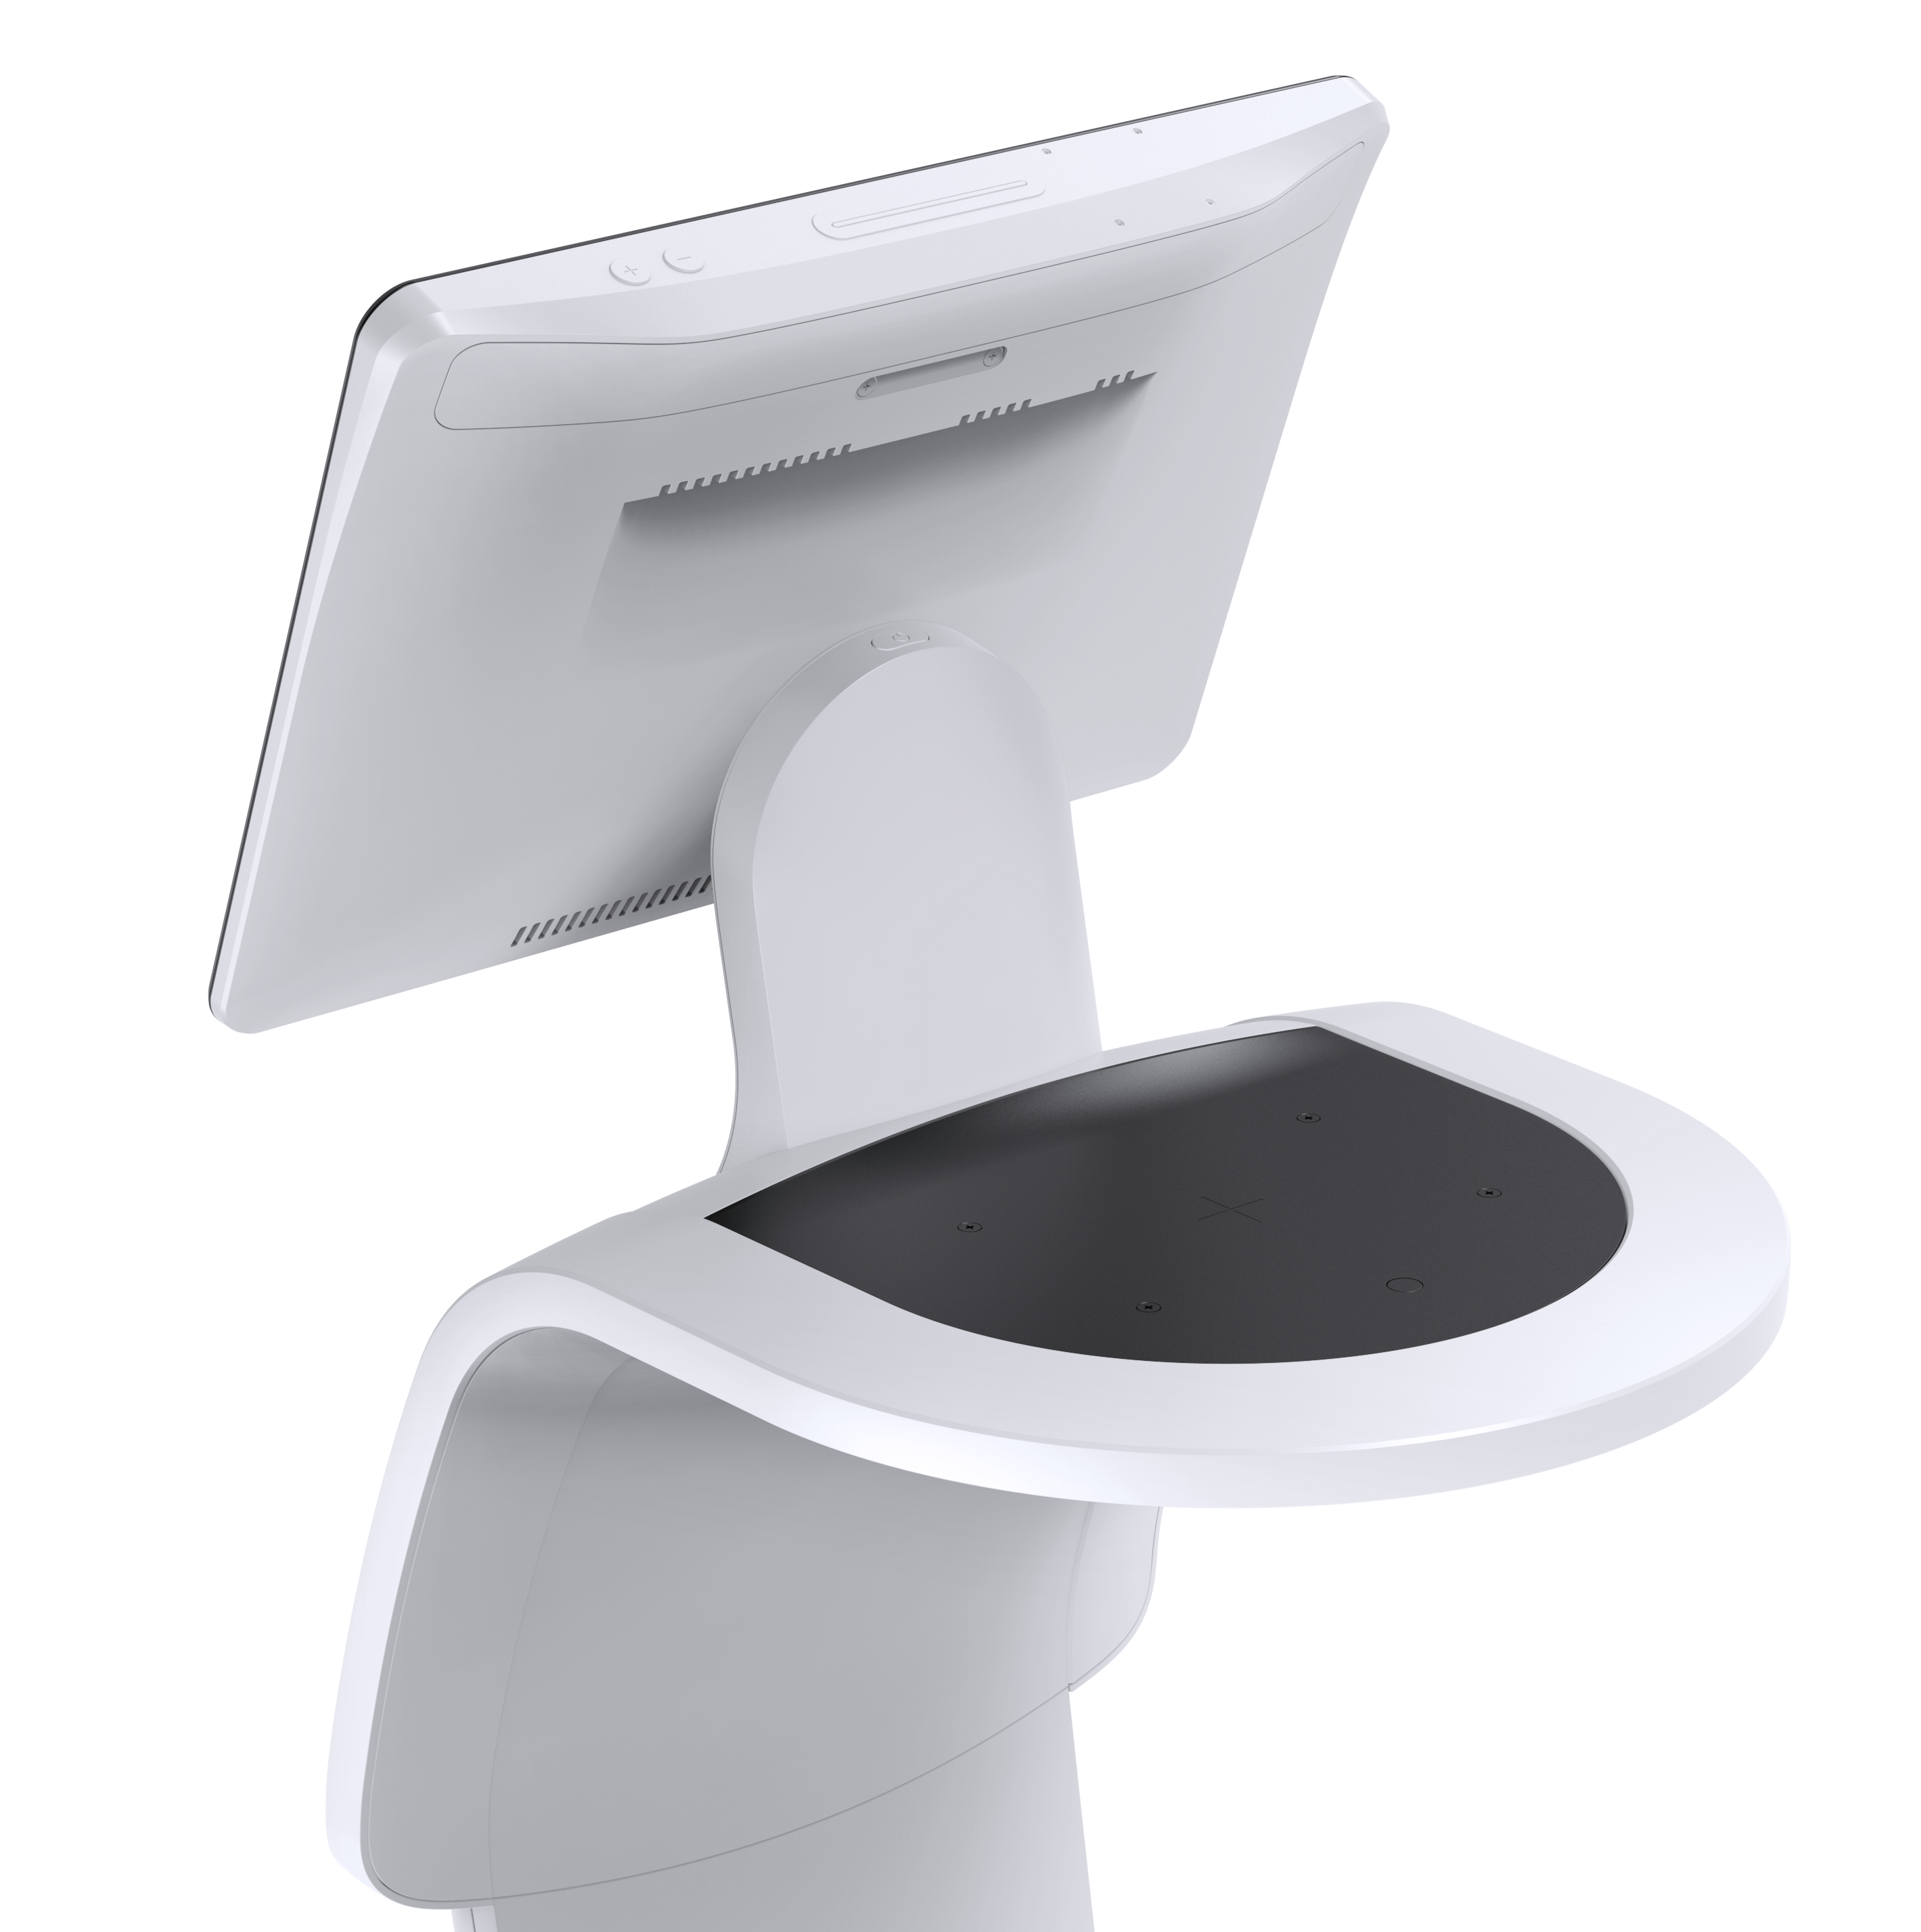
- The stop button is the large red emergency button on the robot’s top panel. Show everyone in the household where it is.
- The Temi Go weighs only 12 kg and drives at a maximum of 3.6 km/h, so it’s unlikely to cause injury. Still, it’s wise to supervise the first few autonomous trips.
> [CRITICAL] First‑time setup without a stable dock can cause the robot to wander off before it has a map. Always start with the dock placed against a wall in the room you intend the robot to call “home.”
Floor surface recommendations
| Floor type | Suitability | Notes |
|---|---|---|
| Hardwood / Laminate | ✅ Ideal | Smooth traversal; no issues |
| Tile (ceramic, vinyl) | ✅ Ideal | Ensure grout lines are not >5 mm deep |
| Short‑pile carpet | ✅ Works | No shag; must be tightly woven |
| Thick rug / shag | ❌ Avoid | Depth sensors may fail; edges can trap wheels |
| Stairs, thresholds >1.5 cm | ❌ Avoid | Not designed for steps; use a ramp if necessary |
Step 1: Unboxing & Physical Inspection
The Temi Go arrives in a reinforced cardboard box. Follow these steps to avoid damaging the robot as you take it out.
- Open the box and remove the top foam insert.
- Lift the robot’s cardboard sleeve straight up. The robot is now visible, secured by foam blocks around the base and screen.
- Remove all packaging — there are plastic film protectors on the 10.1‑inch touchscreen and the front‑facing camera. Peel these off carefully.
- Check that the charging dock and power cable are in the separate cardboard tray at the bottom of the box.
- Inspect the robot physically:
- The three wheels (two drive wheels and one front caster) should turn freely.
- The payload tray (3 kg capacity) should be dry and undamaged.
- The screen should be free of cracks; the robot ships with a pre‑applied screen protector.
- The depth camera array (above the screen) and 2D lidar (in the bumper) should be clean.
- Keep the original packaging if you plan to transport the robot later.
> If anything is missing or damaged, contact Temi support immediately — do not power on the robot.

Step 2: Battery Charging & First Power‑On
The Temi Go uses a sealed lithium‑ion battery that gives up to 8 hours of continuous use. Before first use, follow these steps to ensure a healthy battery and correct power‑on sequence.
Charging the robot 1. Place the dock in its final location, flat against a wall, with at least 1 m of clear space left and right. 2. Plug the dock’s power adapter into a wall outlet. 3. Gently roll the Temi Go onto the dock. The charging contacts are on the robot’s rear base; they must align with the metal pads on the dock. When the connection is good, the robot’s screen will light up and show a charging icon. 4. Let the robot charge until the battery indicator reaches 100 % — this takes about 2 hours from empty, or just 15–20 minutes if the robot arrived with a partial charge. The LED ring around the top will glow green when fully charged.
Power‑on button sequence - Full power‑off: If the robot was completely shut down for shipping, press and hold the power button (on the rear panel) for 5 seconds. The screen will boot into the Temi OS. - Sleep/wake: In normal use, a short press on the power button puts the robot to sleep; a short press wakes it up. The robot also wakes automatically when it hears “Hey Temi” (once the wake word is enabled after setup).
> Tip: If the robot doesn’t respond to the power button, it might be in a deep‑discharge protection mode. Dock it and wait 10 minutes; the battery management system will wake automatically.
Step 3: Installing the Temi App & Account Setup
All control — mapping, telepresence, delivery orders, and robot settings — happens through the Temi App, available for iOS and Android.
- Download the Temi App from the official app store (search for “Temi Robot” to find the correct one).
- Open the app and tap Create Account. You’ll need an email address and a phone number for verification.
- After logging in, the app prompts you to Add a Robot. Select “Temi Go” from the list.
- Make sure your phone is connected to the same Wi‑Fi network you want the robot to use.
- Grant the app the necessary permissions: Bluetooth (for initial pairing), Location (needed for Wi‑Fi scanning on Android), and Microphone (optional, for voice calls).
- The app will now search for nearby Temi Go units. If your robot is on the dock and powered on, it should appear within 10 seconds. Tap it to link the robot to your account. You’ll be asked to name the robot (e.g., “HomeBot”).
> The app uses your phone’s Bluetooth to transfer the Wi‑Fi credentials securely during first pairing — keep Bluetooth turned on until the Wi‑Fi connection is confirmed.
Step 4: Connecting the Temi Go to Wi‑Fi
Once the robot is linked to your account, the app pushes your home’s Wi‑Fi credentials to the robot. If the connection fails or you need to change networks, use these steps.
- On the robot’s screen, swipe down from the top edge to open the Quick Settings panel.
- Tap Wi‑Fi. The robot scans for networks.
- Select your home network and enter the password using the on‑screen keyboard.
- Verify that the robot receives an IP address. You can find this under Settings → About → Network. It should be a standard DHCP address (e.g., 192.168.1.x).
- If you require a static IP for advanced developer use, set it in the same menu, but note that the robot must then reconnect. For most users, DHCP is sufficient.
Network requirements - The Temi Go supports both 2.4 GHz and 5 GHz Wi‑Fi. A 5 GHz network is recommended for smoother video streaming during telepresence calls. - A minimum of 2 Mbps upload speed is required for remote operation; 5 Mbps or higher ensures high‑definition video. - If you plan to use the robot on multiple floors, ensure each floor’s access point broadcasts the same SSID with seamless roaming. The robot will transition between access points automatically.
> If you experience “robot offline” errors in the app, first check that your phone and the robot are on the exact same Wi‑Fi network (same SSID, same band).
Step 5: Mapping Your Space (Calibration & Autonomy)
The Temi Go builds a 2D floor map using its lidar and depth sensors. A good map is essential for autonomous delivery and waypoint navigation.
- In the Temi App, go to Robot Settings → Mapping → Create New Map.
- The robot will undock and start spinning in place to orient itself. Stay nearby.
- Slowly walk alongside the robot as it explores. Use the app’s on‑screen joystick to guide it into every room you want it to use. Do not push the robot — it must drive itself to record odometry accurately.
- Mark important locations: tap the + icon on the map to add named waypoints such as “Kitchen,” “Office,” and “Living Room.”
- Once all rooms are mapped, tap Save & Complete. The robot returns to the dock automatically.
- You can now draw virtual walls and no‑go zones on the map in the app. For example, block off a pet food area or a delicate rug.
> The mapping phase may take 20–30 minutes for a 100 m² apartment. You can extend the map later with the “Update Map” feature, which appends new rooms rather than starting from scratch.
Step 6: Firmware Update & Security Hardening
Keeping the Temi Go software up to date fixes bugs, improves navigation, and closes security vulnerabilities.
- In the app, go to Settings → Software Update. The robot checks for the latest firmware automatically.
- If an update is available, tap Download and Install. The robot will need to be on the dock with at least 30 % battery. The process takes about 10 minutes, and the robot reboots several times — do not interrupt it.
- After the update, verify the new firmware version under About.
Security hardening (home‑use essentials) - Change the robot’s administrator password from the default (often “admin” / “temi123”). Go to Settings → Security → Admin Password and set a strong, unique passphrase. - Enable screen lock with a PIN so that no one can tamper with the robot’s settings or view its camera feed without authentication. The PIN is required after a reboot or after a period of inactivity you define. - Disable guest access if you don’t want visitors to control the robot via the app without an invitation. You can set up guest profiles separately. - Review privacy settings: by default, the robot’s camera and microphone are only active during a call or when you explicitly enable them. Ensure “Local processing only” is turned on if you want the robot’s mapping and speech recognition to happen on‑device rather than in the cloud.
> The Temi Go runs a hardened Android‑based OS. Regular firmware updates are your best line of defence — schedule a monthly check.
Step 7: SDK & ROS 2 Integration (Advanced)
For developers who want to build custom apps, autonomous routines, or integrate the Temi Go into a larger robotics stack, Temi provides an Android SDK and a community‑maintained ROS 2 bridge.
Temi SDK (Android) 1. Go to developer.temi.com (official portal) and create a developer account. 2. Download the latest Temi SDK .aar library and the sample projects. 3. The SDK allows you to control navigation, receive sensor data (lidar, depth camera), and use the speaker/microphone. 4. To deploy your app, enable Developer Mode on the robot: in the app, go to Settings → About, tap the “Build number” seven times, then enter the admin password. A new Developer Options menu appears. 5. From there, turn on USB Debugging and connect your computer via USB‑C to install APKs using adb.
ROS 2 bridge An unofficial but widely‑used temi_ros package provides a ROS 2 node that reads lidar scans, odometry, and battery status, and publishes velocity commands. Because the Temi Go’s official API is stable, the bridge is quite reliable. - Clone the temi_ros repository from GitHub (search for “temi_ros”) and follow the instructions for your ROS 2 distribution (Humble or later). - The bridge runs on an external computer that communicates with the robot over Wi‑Fi using the robot’s REST API. - Typical IP scheme: the robot receives a DHCP address on your LAN; you then configure the bridge to point to that IP.
> Note: the Temi Go does not expose a low‑level motor API or real‑time control — all commands go through the high‑level Android SDK. If you need microsecond‑level control, this robot is not the platform for it.
Step 8: First Delivery & Telepresence Walk‑Through
Now that the robot is online, mapped, and updated, it’s time to test the two core features.
Sending the robot on a delivery 1. Place a small object (e.g., a beverage can) on the payload tray. The tray holds up to 3 kg. 2. In the Temi App, tap Deliver, then choose a destination waypoint (e.g., “Office”). 3. The robot undocks, navigates to the target, and announces its arrival (“Temi has a delivery for you!”). The receiver can take the item and tap the screen to confirm. 4. The robot then returns to the dock, or you can send it to a different location.
Telepresence call 1. In the app, tap Call; the robot’s screen rings. Anyone near the robot can answer with a tap or by saying “Hey Temi, accept call.” 2. You’ll see the robot’s front‑facing camera feed on your phone, and your face appears on the robot’s screen. You can drive the robot remotely using on‑screen joystick controls. 3. The video quality depends on your Wi‑Fi: 5 GHz yields 1080p, while 2.4 GHz may drop to 720p. 4. Hang up to end the session — the robot stays at its current location until you command it to return home.
> Practice with a short delivery or call in the same room before attempting cross‑house navigation — it builds confidence and reveals any leftover mapping gaps.
Defining Success: Minimum / Full / Advanced
| Tier | What it looks like |
|---|---|
| Minimum viable | Robot powers on, connects to the app, and can be manually driven via the joystick. You can make a telepresence call. |
| Full operational | The entire home floor is mapped with named waypoints; robot successfully completes autonomous deliveries between rooms and returns to the dock. Firmware is up to date, and the admin password is set. |
| Advanced | The Temi SDK or ROS 2 bridge is installed; a custom app runs on‑device or an external computer controls the robot’s navigation programmatically. The robot can be integrated into a smart‑home routine (e.g., delivering a snack when a calendar event ends). |
Common Setup Mistakes & Fixes
| # | Mistake / Symptom | Root Cause | Fix |
|---|---|---|---|
| 1 | Robot won’t appear during Bluetooth pairing in the app | Phone Bluetooth is off, or robot is still in deep sleep | Turn on Bluetooth; wake the robot by pressing the power button or docking it |
| 2 | Wi‑Fi connection fails repeatedly | Wrong password, or network uses a captive portal (hotel Wi‑Fi) | Double‑check password; use a standard home network. Temi does not support captive portals for initial setup |
| 3 | “Robot offline” message even though it’s on | Phone and robot are on different Wi‑Fi bands (2.4 GHz vs 5 GHz) or different SSIDs | Connect both to the exact same SSID; temporarily disable band steering in your router |
| 4 | Map looks distorted, robot bumps into walls | Room had direct sunlight or reflective surfaces; lidar confused | Close curtains; cover mirrors or large windows during mapping. Re‑run the map |
| 5 | Robot fails to undock or return to dock | Dock is not against a wall, or the robot’s approach angle is blocked | Place dock flat against a wall with 1 m clearance on each side; delete and re‑create the dock position in the map |
| 6 | Delivery waypoint not selectable | Waypoint wasn’t saved properly, or map was modified | Delete and re‑add the waypoint in the mapping screen |
| 7 | Telepresence video is pixelated or laggy | Low upload speed or interference on 2.4 GHz | Move the router closer; connect robot to 5 GHz band; check internet upload speed (needs ≥2 Mbps) |
| 8 | Battery drains faster than 8 hours | Robot continuously re‑maps or screen brightness at max | Reduce screen timeout; ensure “auto‑map update” is off unless needed; lower screen brightness |
| 9 | Can’t install custom APK via USB | Developer Mode not enabled, or USB debugging is off | Follow Step 7: enable Developer Options and toggle USB Debugging |
| 10 | Robot speaks Hebrew/localized prompts unexpectedly | Language setting reset after firmware update | Go to Settings → Language and re‑select English (or your preferred language) |
Kommentit