

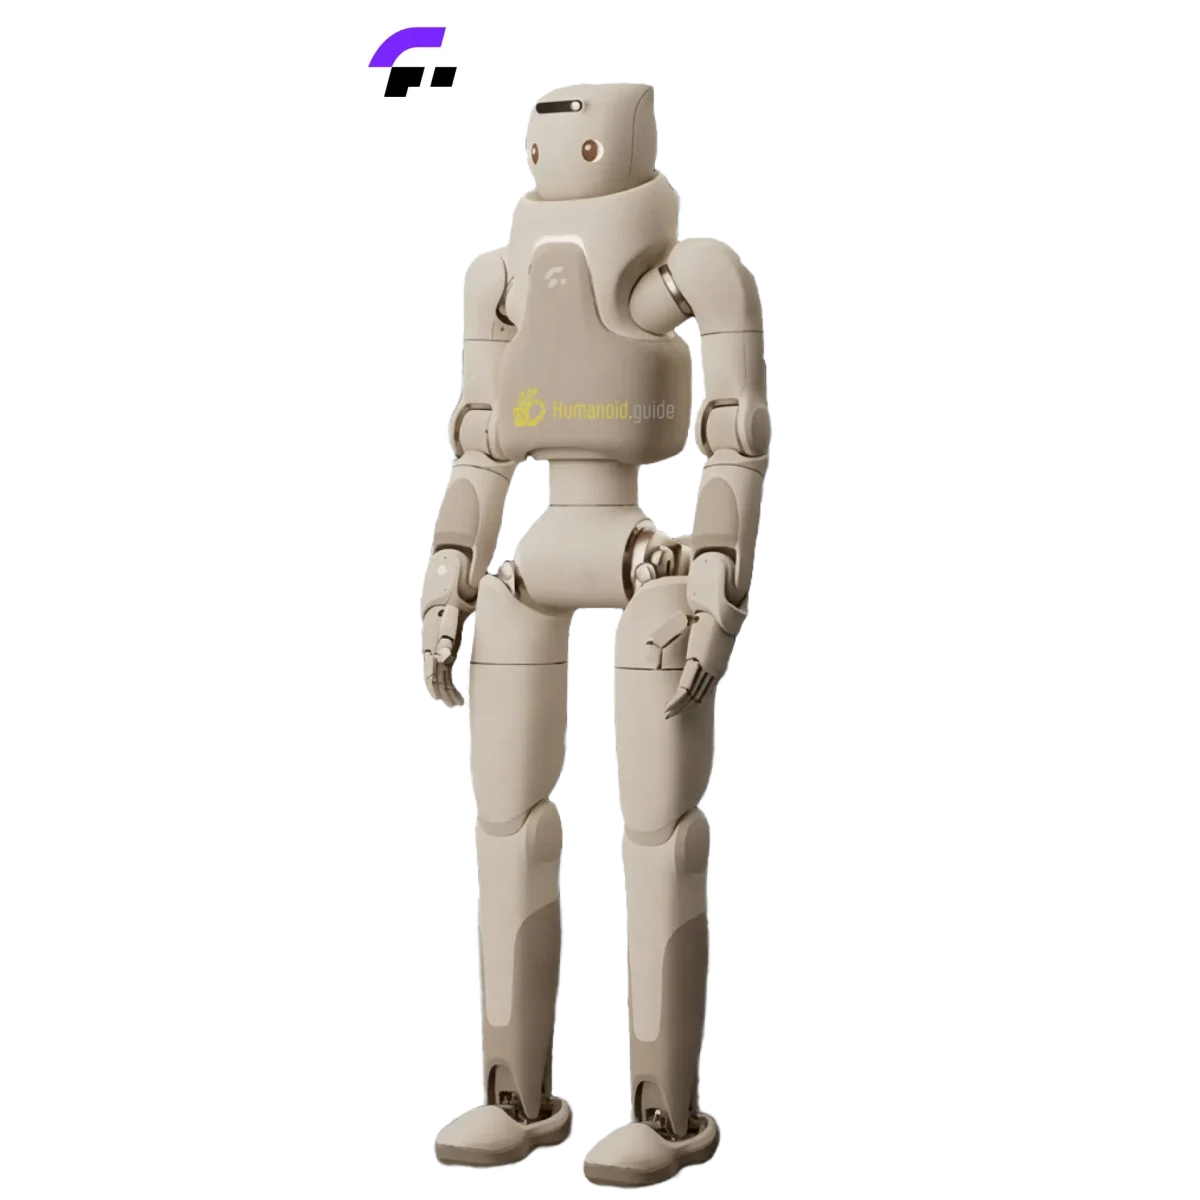
Setting up the Fourier GR‑3 at home takes about 2 hours and four phases: unbox and inspect, install and charge the high‑capacity battery, connect over Ethernet or Wi‑Fi (set your PC to the robot’s subnet as specified in the manual), update to the latest available firmware, and run the onboard calibration sequence. You need at least 3 m × 3 m of clear, non‑slip floor space and an emergency‑stop within reach before first power‑on.
What You’ll Need: Tools, Space & Time
Before you open the crate, gather these items:
- Tools & supplies
- Laptop with an Ethernet port (or USB‑to‑Ethernet adapter)
- Heavy‑duty suspension rig / A‑frame stand (capable of holding ≥70 kg)
- Anti‑fatigue rubber floor mat (at least 3 m × 3 m)
- Safety mirror / camera to monitor blind spots
- Cable ties and hook‑and‑loop straps (for cable management)
- Torque wrench (for stand‑by bolts, if required)
- Space
- Minimum clear area: 3 m × 3 m (larger recommended for walking)
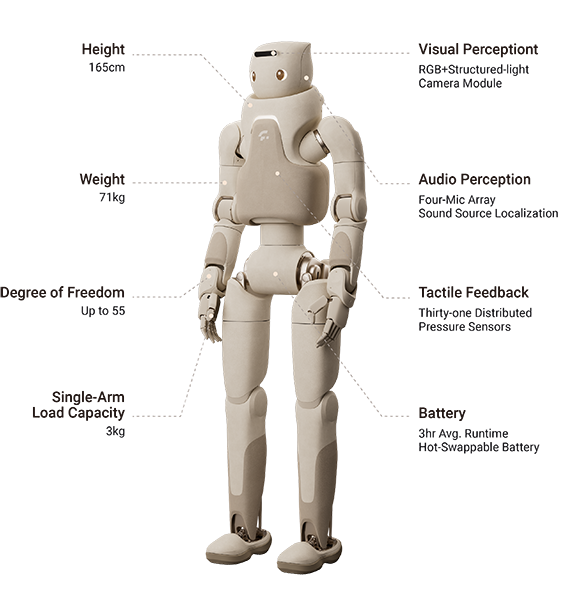
- Ceiling clearance: at least 2.2 m (the GR‑3 is 1.68 m tall, but arms raise above head)
- Flat, non‑slip indoor floor (hardwood, short‑pile carpet, or smooth concrete)
- Time estimate (first‑time user)
| Phase | Duration |
|---|---|
| Unboxing & physical inspection | 20–30 min |
| Battery install & charging | 45–60 min (depends on initial charge level) |
| Network & binding | 20 min |
| Firmware update | 15–30 min |
| Calibration & first movement | 20–30 min |
| Total | ≈2 hours |
> Note: As a pre‑order humanoid, your GR‑3 will ship with the latest stable firmware. Actual charging time may vary based on the battery’s state of charge out‑of‑the‑box – expect a full charge cycle to take around 2 hours using the included 350 W charger.
Before You Start: Safety & Space Requirements
[CRITICAL] Safety Rules
- Exclusion zone – Mark a 4 m × 4 m safe area with tape or cones. No person or pet should enter while the robot is powered on.
- Emergency stop – Identify the physical e‑stop button (located on the back of the torso) and keep it within arm’s reach during startup.
- Suspension is mandatory – The GR‑3 must be suspended from a rig or securely seated on a support stand during its first power‑on, firmware update, and calibration. Its 55 degrees of freedom (23×2 in the hands alone) make it a top‑heavy biped that can tip over before balance algorithms are active.
- Floor surface – Hard surfaces (hardwood, polished concrete) are ideal. Plush carpet can interfere with foot slip detection. If using carpet, place a rigid board under the robot’s feet.
- Power off when unattended – Remove the battery or engage the e‑stop when you’re not directly supervising the robot.
The GR‑3 is not yet safety‑rated for collaborative operation (ISO 10218‑1) – treat it as an industrial‑grade research platform and never grab its limbs while it is under power.
Step 1 – Unboxing & Physical Inspection
- Position the crate – Place the shipping crate in the center of your cleared floor area.
- Open the lid carefully – The crate contains a top foam shell; lift it straight up to reveal the robot.
- Check for shipping damage – Visually inspect the outer shell, limb actuators, hands (22 DOF each), and the head unit for cracks or dents.
- Inventory the accessories – The crate includes:
- GR‑3 robot body
- 48 V / 350 W charger with power cable
- Quick‑start paper manual
- USB flash drive with calibration files
- Spare foot pads
- (Optional) suspension‑rig mounting bolts
- Remove the robot – With at least two people, lift the robot upright and hang it on the suspension rig using the lifting lugs on its shoulders. Never place it standing unsupported before calibration.
Step 2 – Battery Installation & Charging
- Locate the battery compartment – It is on the robot’s back, between the shoulder blades.
- Insert the battery pack – Slide it in until you hear an audible click. Do not force; the connector is keyed.
- Connect the charger – Plug the 48 V charger into the charging port (under the battery’s dust cover) and then into a surge‑protected wall outlet.
- Monitor the charge LED – A blinking green light indicates charging; a solid green means full. First‑time charging can take up to 2 hours.
- Do not power on while charging – Wait until the battery reaches at least 80% before pressing the power button.
> Battery spec: 48 V, approx. 2.4 kWh lithium‑ion pack. Real‑world runtime is 3 hours under mixed walking/manipulation loads.
Step 3 – Powering On & First Boot
- Double‑check the suspension – The robot must hang freely or be seated firmly on the support stand.
- Press the power button – The button is recessed on the right side of the chest chassis. Press and hold for 3 seconds until the status LED turns blue.
- Wait for the boot sequence – The head display will show “Fourier GR‑3” and then a progress bar. Full boot takes 90–120 seconds. The LED will pulse blue when ready.
- Listen for the actuator self‑check – You’ll hear a sequence of soft whirs and clicks as each motor verifies its hall sensors. This indicates the low‑level control system is alive.
- Do not attempt to stand it yet – Keep the robot suspended; configuration is next.
Step 4 – Network Configuration (Wi‑Fi vs Ethernet)
The GR‑3’s onboard computer communicates over a 10.10.10.x/24 subnet (preliminary; verify against your unit’s documentation). You must configure your laptop to be on the same subnet.
Option A: Wired Ethernet (recommended for development) 1. Connect an Ethernet cable between your laptop and the robot’s RJ‑45 port (behind a rubber cover on the lower back). 2. Set your PC’s static IP to 10.10.10.100 (subnet 255.255.255.0, no default gateway). 3. Confirm connectivity: ping 10.10.10.1 (the robot’s fixed IP) – you should see replies.
Option B: Wi‑Fi 1. Using the provided USB flash drive, create a wpa_supplicant.conf file with your home network SSID and password. 2. Insert the drive into the USB port on the robot’s head unit and power‑cycle the robot. It will automatically connect. 3. Find the robot’s IP via your router’s DHCP client list, then set your PC to a static IP on the same subnet (avoid the robot’s IP).
> Important: For SDK/ROS2 communication, a direct Ethernet link gives the lowest latency and most stable connection. Wi‑Fi works for basic teleoperation, but dropouts can cause unexpected motion.
Step 5 – App / Remote Control Binding
Fourier provides a GR‑Control app (Android/iOS) available for download from their support portal.
- Launch the app and create an account if required.
- Tap “Add Robot” and follow the on‑screen pairing. The robot will broadcast a Bluetooth advertisement; select it from the list.
- Enter the binding PIN (default:
123456– change it later). - Test the link – The app should show battery level and joint states. Toggle the e‑stop simulation in the app; the robot’s physical LED will flash red.
Keep the phone/tablet within Bluetooth range at all times during initial operation.
Step 6 – Firmware Update & Security Hardening
Even a freshly delivered GR‑3 may have a newer firmware version that improves balance and safety interlocks.
- Check the current firmware – In the GR‑Control app, go to Settings → Robot Info and note the version string.
- Download the latest firmware – Visit Fourier’s support portal (registration required) and download the
.fwufile onto the USB flash drive. - Apply the update – Insert the drive into the robot’s USB port, then in the app choose Firmware → Update from USB. The robot will reboot automatically; do not interrupt – the process takes 12–15 minutes.
- Security hardening (generic humanoid)
- Change the default PIN in the app immediately.
- Disable Bluetooth discovery after pairing (set the robot to “Hidden” mode).
- If the robot will be connected to your home Wi‑Fi, segment it onto an isolated VLAN or guest network to contain any unexpected network traffic.
- As a pre‑order platform, keep an eye on CVE‑listings for humanoid robots. For now, no wormable vulnerabilities are known; however, treat any network‑exposed robot as a potential vector.
Step 7 – SDK / ROS2 Setup (Advanced)
Fourier distributes its development kit via a GitHub repository (fourier‑robotics/gr3_sdk). The SDK supports C++ and Python and runs on Ubuntu 22.04 with ROS2 Humble.
- Clone the SDK
   git clone https://github.com/fourier-robotics/gr3_sdk.git ~/gr3_ws/src
cd ~/gr3_ws- Install dependencies (C++)
sudo apt install libeigen3-dev libfranka-dev libxmlrpc-c++8-dev- Build the ROS2 workspace
   colcon build --cmake-args -DCMAKE_BUILD_TYPE=Release
source install/setup.bash- Set up networking – In
~/gr3_ws/src/gr3_sdk/config/network.yaml, set the robot’s IP (default:10.10.10.1) and your PC’s interface name (runip ato find it, e.g.,eth0). - Test the connection
ros2 launch gr3_bringup example_stand.launch.pyThis sends a low‑level torque‑enable command and then a stand‑still pose. If the robot gently shifts its weight and the console prints “Controller active,” the SDK is working.
If you encounter issues: Check that the robot is not in “Safe‑Stop” mode (e‑stop disengaged, battery inserted, and status LED solid blue). Verify the ROS domain ID is not conflicting with another ROS2 setup on your network.
Step 8 – Calibration & First Movement
Calibration aligns the GR‑3’s 55 DOF sensors to produce a stable standing posture.
- Ensure the robot is still suspended.
- Run the calibration routine from the GR‑Control app: Setup → Calibrate All Joints. The robot will move each joint through its range of motion over about 5 minutes. Watch for unusual grinding or knocking.
- Initiate first stand – With the robot still suspended, enable “Ground‑Contact Simulation” in the app. This runs the balance algorithm in a low‑torque mode.
- Lower the robot slowly – Using your suspension rig’s pulleys, bring the feet into light contact with the floor. The robot should start to support its own weight. If it begins to tip, immediately raise it again.
- Disconnect the rig – Only when the robot is standing stably and the app indicates “Balanced” can you disconnect the lifting straps.
- First step – Use the app’s joystick to command a single forward step. If all went well, the GR‑3 will take one step and pause. Repeat a few times before attempting continuous walking.
> Walking speed: Start in “Home Mode,” which limits speed to 0.5 m/s. The full 6.5 km/h top speed is only available in open, obstacle‑free environments.
Defining Success: Minimum / Full / Advanced
| Tier | Definition |
|---|---|
| Minimum viable | Robot powers on, battery charges, app connects, and it maintains a suspended / supported stance without error codes. |
| Full operational | Networked to PC, latest firmware applied, all joints calibrated; robot stands independently and walks safely in your space. |
| Advanced | SDK/ROS2 installed, custom control node running; autonomous navigation or coordinated arm‑hand manipulation demonstrated. |
Common Setup Mistakes & Fixes
| # | Symptom | Root Cause | Fix |
|---|---|---|---|
| 1 | Robot doesn’t power on | Battery not fully seated or completely drained | Push until audible click; charge for 15 minutes before trying again. |
| 2 | Laptop can’t ping robot | PC not on the same subnet (10.10.10.x) or wrong interface | Set static IP 10.10.10.100/24; use Ethernet, not Wi‑Fi for first setup. |
| 3 | Calibration fails – joint error | Suspension rig too tight; robot can’t move freely | Loosen the harness slightly so joints can move ±2° without hitting the gantry. |
| 4 | Robot tips forward during first stand | Balance algorithm not yet engaged / firmware too old | Update firmware; ensure “Ground‑Contact Simulation” is ON before lowering. |
| 5 | App sees robot but won’t bind | Wrong PIN or robot already paired to another device | Reset binding from app; use default PIN; if problem persists, hard‑reset network stack via USB. |
| 6 | GR‑Control app disconnects frequently | Weak Bluetooth signal or interference | Move phone within 2 m of robot; disable Wi‑Fi on phone to reduce 2.4 GHz noise. |
| 7 | SDK example “ros2 launch” hangs | Incorrect interface name in network.yaml | Run ip link show, find the Ethernet interface (e.g., enp4s0) and update the config. |
| 8 | Hands won’t open/close | Firmware bug related to 22‑DOF hand driver | Update firmware to latest; if still stuck, run dedicated hand‑actuator calibration from app. |
| 9 | Walking produces loud clacking | Feet landing flat but hard | Increase foot‑strike damping coefficient in the controller (tuning needed) or add a thin rubber underlay. |
| 10 | Robot stops mid‑walk with e‑stop light | Emergency‑stop loop triggered by high joint current | Check for cable pinch; reduce payload to ≤15 kg; re‑calibrate. |
Comentarii