

Setting up the ROBROS IGRIS-C at home takes about 3.5 hours and four phases: unbox and inspect, charge the battery, connect over Ethernet (set your PC to a static IP on the robot’s subnet per the manual), then update firmware and run calibration. You need at least 3 m × 3 m of clear space, a suspension rig to prevent falls, and an emergency-stop within reach before first power‑on. The robot measures 154 cm tall, weighs 56 kg, and has 43 degrees of freedom.
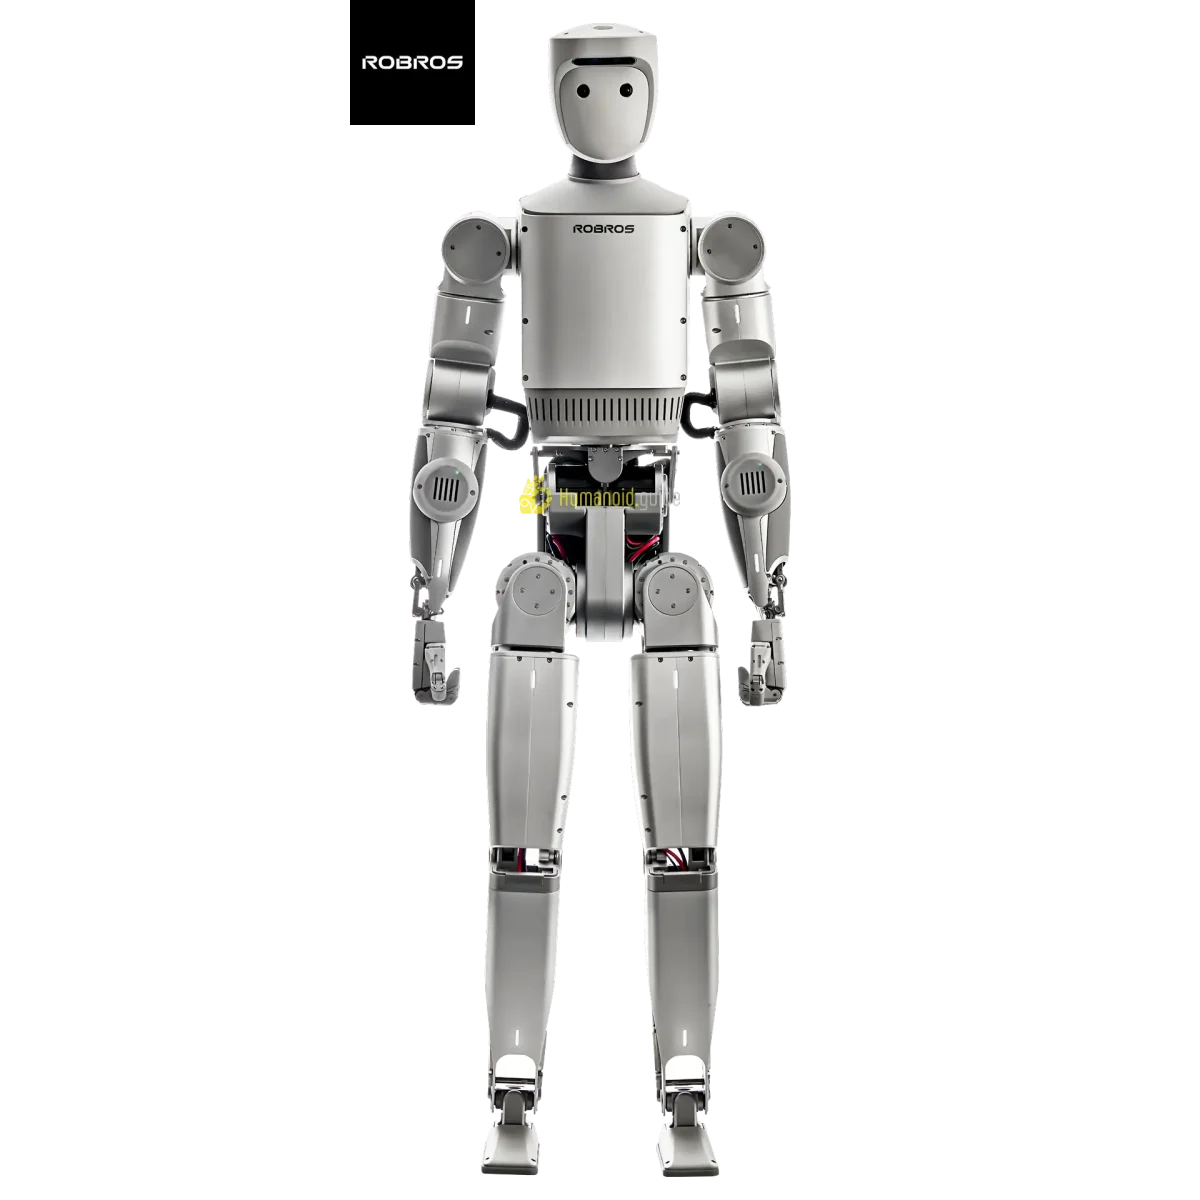
Table of Contents - What You’ll Need: Tools, Space & Time - Before You Start: Safety & Space Requirements - Step 1 – Unboxing & Physical Inspection - Step 2 – Battery Installation & Charging - Step 3 – Powering On & First Boot - Step 4 – Network Configuration (WiFi vs Ethernet) - Step 5 – App / Remote Control Binding - Step 6 – Firmware Update & Security Hardening - Step 7 – SDK / ROS2 Setup (Advanced) - Step 8 – Calibration & First Movement - Defining Success: Minimum / Full / Advanced - Common Setup Mistakes & Fixes - Frequently Asked Questions - About the Author / How We Tested
What You’ll Need: Tools, Space & Time
Before you begin, gather these essentials. The ROBROS IGRIS-C is a full‑size bipedal humanoid (154 cm tall, 56 kg) and demands a prepared workspace.
- Modular suspension rig / overhead gantry – mandatory for first power‑on and calibration to prevent falls. The robot’s weight makes a sturdy support non‑negotiable.
- Ethernet cable (Cat 6 or better) – for initial network setup and SDK development; a direct‑wired connection is more reliable than WiFi.
- Laptop with Ethernet port – running Windows 10/11 or Ubuntu 20.04/22.04 (ROS2 Humble recommended for advanced setup).
- 54V charger (included) – the robot ships with a dedicated power adapter; keep it accessible.
- Anti‑fatigue rubber mat (1.5 m × 2 m) – protects joints and flooring during walking tests.
- Safety mirror (optional) – helps you watch the robot’s back while you stay clear.
- Router with DHCP reservation – for a tidy, static IP assignment on the robot’s subnet.
Set up in a room with at least 3 m × 3 m of clear, flat, non‑slip floor. The ceiling must accommodate the suspension rig and the robot’s full standing height (154 cm). Remove furniture, loose cables, and tripping hazards.
| Setup Phase | Estimated Time |
|---|---|
| Unboxing & inspection | 30 min |
| Battery charging | 2–3 hours |
| Network & app binding | 30 min |
| Firmware update | 20 min |
| Calibration & first walk | 30 min |
| Total first‑time setup | 3.5–4 hours |
Before You Start: Safety & Space Requirements
The IGRIS‑C is a powerful 56 kg robot. A fall can damage the robot and injure bystanders. Treat it with the same caution you would an industrial machine.
- Exclusion zone: mark a 2‑metre radius around the robot with tape. No people or pets inside while the robot is powered.
- Emergency stop: locate the hardware e‑stop (a large red button on the robot’s torso or control box). Keep one hand on it during first movements.
- Suspension rig: suspend the robot before power‑on. A ceiling‑mounted gantry or a free‑standing A‑frame with a secure harness (rated for at least 60 kg) is required.
- Floor surface: work on a flat, hard surface. Carpet and tile grooves can trip the 6‑kg payload‑carrying arms or cause instability.
- Lighting: bright, even illumination helps the onboard cameras and depth sensors function correctly during initial calibration.
> [CRITICAL] Never power on the IGRIS‑C while it stands freely without a suspension rig. Always double‑check that the e‑stop is within reach and tested before each session.
Step 1 – Unboxing & Physical Inspection
- Clear a large floor area. Place the packaging crate next to your suspension rig.
- Open the crate and remove the top foam layer. The robot is heavy; have a second person assist if needed.
- Using the lifting straps (provided), attach the robot to your suspension rig and gently raise it a few centimetres off the crate’s base.
- Inspect every joint, limb, and sensor for physical damage. Pay special attention to the head‑mounted cameras (Intel RealSense units) and the LiDAR on the torso.
- Compare the contents against the packing list in the user manual: robot, battery pack, charger, Ethernet cable, remote control (if supplied), and any calibration tools.
- Record a video of the unboxing for insurance and warranty purposes.
Step 2 – Battery Installation & Charging
The IGRIS‑C uses a swappable lithium‑ion battery pack (2‑hour runtime when new). 1. Locate the battery compartment on the robot’s back. Slide the battery in until the latch clicks firmly. 2. Connect the charger to the robot’s charging port (usually on the lower back). Plug the charger into a grounded outlet. 3. Charge until the indicator shows full – this can take up to 3 hours on a first‑use cycle. Do not power on the robot during this charge. 4. Once charged, disconnect the charger and inspect the battery LED: steady green indicates ready.
Step 3 – Powering On & First Boot
- Confirm the robot is securely suspended and the e‑stop is accessible.
- Press the master power switch (often located behind a protective cover on the torso). The system will boot; the fan and status LEDs will activate.
- Wait 2–3 minutes for the onboard computers to initialise. Do not interrupt the boot sequence.
- The robot’s control app (see Step 5) will eventually show a “ready” state. If the robot does not appear after 5 minutes, refer to the manual’s troubleshooting section – a first‑boot firmware lock is common on enterprise humanoids.
Step 4 – Network Configuration (WiFi vs Ethernet)
For reliable SDK development and teleoperation, a wired connection is recommended.
| Feature | Ethernet (Recommended) | WiFi (for basic control) |
|---|---|---|
| Latency | <1 ms | 10–30 ms |
| Throughput | 1 Gbps | Varies with signal |
| Setup effort | Moderate | Low |
| Multi‑session | Excellent | Can drop under load |
- Connect an Ethernet cable between the robot’s control box port and your router or directly to your laptop.
- Consult the user manual for the default IP subnet (often a common
192.168.x.xrange). Set your PC’s Ethernet adapter to a static IP on that subnet, reserving the robot’s default address for the robot only. - Ping the robot’s IP from your PC to confirm connectivity.
- If WiFi is available, you can connect the robot to your home network via the companion app – but this mode is less stable for real‑time control.
Step 5 – App / Remote Control Binding
- Download the ROBROS Control App from the manufacturer’s website (Windows and iOS/Android versions may be available). Install it on your laptop.
- Launch the app and create an account. The app will scan the network for the robot. If the robot is on the same subnet, it should appear in the device list.
- Select the IGRIS‑C and follow the on‑screen binding process. You may be asked to press a physical “pairing” button on the robot’s torso.
- Once bound, test the emergency stop function in the app: send a “stop motors” command and verify the robot immediately halts.
- If a dedicated remote control was included, pair it via Bluetooth using the app’s “Remote Devices” menu.
Step 6 – Firmware Update & Security Hardening
Out‑of‑the‑box firmware may be several versions behind. Updating is critical for stability and safety.
- Open the ROBROS support portal (URL provided with the robot) and download the latest firmware package.
- Transfer the package to the robot via USB or the app’s update wizard.
- Initiate the update; the robot will reboot several times. Do not disconnect power or Ethernet during the process.
- After the update, reset the app’s connection and verify the firmware version in the “About” screen of the app.
Security: Change all default credentials immediately – the support portal, the robot’s remote access password, and any developer accounts. Segment the robot on a separate VLAN if your network supports it. The IGRIS‑C is an enterprise machine; protect it from unauthorised access just as you would a server.
Step 7 – SDK / ROS2 Setup (Advanced)
ROBROS provides a proprietary SDK for the IGRIS‑C, typically available under an enterprise agreement. Contact your sales representative for access.
General workflow (example structure – consult the official documentation for exact commands): ``bash # Clone the SDK repository (URL supplied by ROBROS) git clone https://repo.robros.com/igris-c/sdk.git cd sdk # Build mkdir build && cd build cmake .. -DCMAKE_INSTALL_PREFIX=/opt/robros make -j$(nproc) sudo make install ` If the SDK is ROS2‑based (common for humanoids in 2026), you will work with a ROS2 overlay. Install ROS2 Humble on Ubuntu 22.04, then: `bash mkdir -p ~/igris_ws/src cd ~/igris_ws/src # Add custom ROS packages provided by ROBROS # ... cd ~/igris_ws colcon build --symlink-install source install/setup.bash `` The robot communicates using DDS (likely a custom profile). The robot’s IP, port, and DDS discovery configuration will be detailed in the integration guide.
> Note: The IGRIS‑C’s high‑level control API requires the robot to be in operational mode (not calibration mode) and may need a physical safety key engaged.
Step 8 – Calibration & First Movement
- Keep the robot suspended. Launch the calibration app (included with the control suite).
- Follow the guided joint‑homing routine: each joint will move through its range. Observe for any binding or unexpected noise.
- Once homing completes, the robot will attempt a static stand while still supported. If it stands without unusual wobble, proceed to “zero‑offset” calibration – typically a few minutes of data collection.
- For the first walking test, reduce the gait speed in the app to 20% of maximum (3.6 km/h = 0.7 km/h). Engage the dead‑man switch (hold a button on the remote or app; releasing it stops the robot).
- Command one step forward while watching the robot from outside the exclusion zone. If the robot loses balance, the suspension rig will catch it.
- Gradually increase speed and complexity over several sessions. Always perform new movements under suspension first.
Defining Success: Minimum / Full / Advanced
| Tier | Definition |
|---|---|
| Minimum viable | Robot powers on, binds to the app, stands with suspension support, and responds to basic stop/go commands. |
| Full operational | Robot stands independently, walks slowly on flat floor, network and firmware are up to date, and the e‑stop functions reliably. |
| Advanced | SDK/ROS2 installed, custom control loops running, the robot performs autonomous navigation or manipulation using the 43‑DOF body and 6‑kg payload arms. |
Common Setup Mistakes & Fixes
| Symptom | Root Cause | Fix |
|---|---|---|
| Robot does not power on | Battery not fully seated or fully discharged | Re‑insert battery until click; charge for 2+ hours. |
| Suspension rig sags or fails under load | Rig rated below robot’s 56 kg weight | Use a rig with a 60‑kg minimum safe working load. |
| Robot falls on first boot | Started without suspension rig | Always suspend before power‑on; never skip safety step. |
| Cannot ping robot’s IP | PC not on the same subnet or cable loose | Check Ethernet link; set static IP to manual‑recommended subnet. |
| App cannot bind to robot | Robot not in pairing mode or on wrong network | Reboot app; press physical pairing button; verify subnet. |
| Firmware update stalls or reboots loop | Interrupted network or incompatible package | Re‑download firmware; use USB method per manual. |
| SDK commands are ignored | Robot not in operational mode or safety key missing | Check status in app; enable operational mode and insert safety key. |
| Calibration fails repeatedly | Joint sensors misaligned after shipping | Contact ROBROS support for remote recalibration assistance. |
| Robot walks erratically after calibration | Gait parameters too aggressive for floor surface | Reduce step length and speed incrementally. |
| Battery runtime far below 2 hours | Battery not fully cycled or aged | Run two full charge/discharge cycles; replace battery if still short. |
Comments