

Setting up the AgiBot A2 at home currently requires pre‑order access and a 4×4 m clear, flat indoor space. After unboxing and charging the high‑capacity battery (5‑h runtime), you’ll connect over Ethernet (IP/subnet details to be confirmed by manufacturer), install the latest firmware, and calibrate the 49‑DOF, 55 kg robot. Use a suspension rig for first boot, keep the e‑stop in reach, and limit speed to 1 m/s indoors. Full setup may take 2–3 h; check the BotMarket Robot Database for live listings.
What You’ll Need: Tools, Space & Time
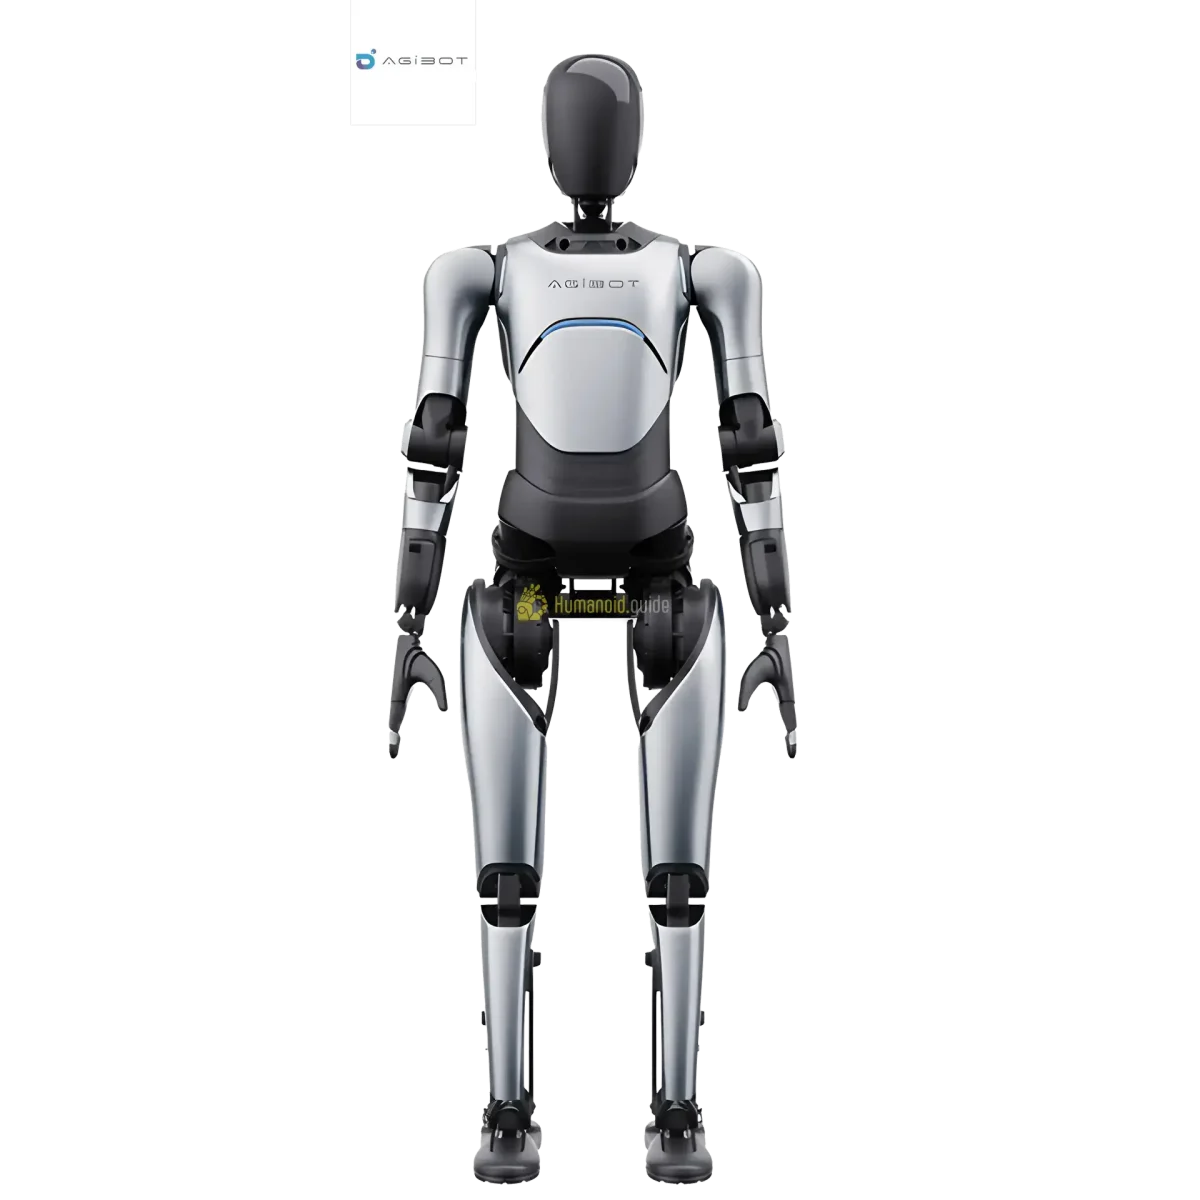
Before your AgiBot A2 arrives (pre‑orders are now being accepted, with deliveries anticipated in 2025–2026), gather the following essentials. Because the robot is a 55 kg, 1.69 m tall humanoid with 49 degrees of freedom, a methodical setup protects both you and the hardware.
Required Tools and Supplies
- AgiBot A2 battery (high‑capacity pack, likely a quick‑release module – exact specification to be confirmed in the final shipment).
- OEM charger (will be supplied in the box; amperage/voltage TBD).
- Laptop or desktop PC (running Ubuntu 20.04 or newer, as most humanoid SDKs require).
- Ethernet cable (CAT 6 recommended for reliable networking during setup).
- Suspension rig / overhead stand – critical for first power‑on (the robot must be supported while self‑calibrating).
- Anti‑fatigue / rubber safety mat (flat, non‑slip surface covering at least 2 m × 2 m).
- Safety mirror (to monitor the robot from all angles).
- Heavy‑duty extension cord and a dedicated power outlet.
- Smartphone or tablet (for the AgiBot companion app, if released).
Minimum Required Space
The AgiBot A2 reaches 1.69 m in height and can move at up to 3.3 m/s. For safe home operation, we recommend a clear, obstruction‑free area of 4 m × 4 m. The floor must be level, indoor, and non‑slip; avoid carpets with loose fibres. Allow an additional 1 m exclusion zone around the perimeter that no person or pet enters while the robot is powered on.
Per‑Phase Time Estimates
| Phase | Estimated time | Notes |
|---|---|---|
| Unboxing & physical inspection | 20 min | Check for shipping damage |
| Battery installation & charging | 1.5–2 h | First charge may be longer; follow OEM instructions |
| Network configuration | 20 min | Wired Ethernet strongly recommended |
| Firmware update & security hardening | 30 min | Download the latest from AgiBot portal |
| Calibration & first movement | 30 min | Robot must remain suspended |
| Total (first‑time setup) | ~2.5–3.5 h |
Before You Start: Safety & Space Requirements
- Exclusion zone: Mark a clearly visible 4 m × 4 m operating area plus a 1 m buffer. Use floor tape or cones.
- Emergency‑stop (e‑stop): The robot will include a physical e‑stop button (likely on the back or chest). In addition, keep the power‑kill switch on the charger accessible. Assign a “spotter” who can hit the e‑stop instantly.
- Suspension requirement: For first boot and calibration, the A2 must be hung from a rigid overhead point (e.g., a heavy‑bag stand or steel‑beam hoist rated for ≥80 kg). This prevents falls during initial motor zeroing.
- Floor surface: Use a flat, non‑slip mat. Hardwood or smooth concrete can cause slippage; rubber gym mats work best. Avoid deep‑pile carpet.
- Environmental controls: The A2 is designed for indoor use (0 °C–40 °C). Keep humidity below 80% non‑condensing to protect electronics.
Once the robot has passed its first full calibration and you have thoroughly tested the e‑stop, you may reduce some precautions – but always keep the exclusion zone in place.
Step 1 — Unboxing & Physical Inspection
1. Move the shipping crate into your prepared area before opening it. The crate will be large and heavy; use a pallet jack if possible.
2. Cut the straps and remove the top lid. Inside you’ll find the AgiBot A2 secured with foam blocks and straps.
3. Photograph all contents before removing them; this serves as a record for any shipping‑damage claims.
4. Lift the robot out using the designated handle points (likely under the arms and at the hip). Do not lift by the head or limbs – you could damage actuators.
5. Place the robot on its back on the safety mat.
6. Unpack the charger, any dongles, the tablet (if included), and documentation.
7. Visually inspect every joint, cover, and sensor for cracks, loose screws, or disconnected cables. Pay special attention to the LiDAR/facial camera array (if any) and the battery bay connectors.
Step 2 — Battery Installation & Charging
The A2 uses a high‑capacity battery pack (runtime up to 5 h, according to AgiBot). The exact chemistry (Li‑ion or LiFePO₄) and watt‑hour rating will be confirmed in the final shipment.
- If the battery is pre‑installed: Check the battery‑release latch. You may need to remove a shipping‑lock screw. Refer to the included quick‑start guide.
- If the battery is separate: Align the pack with the slot on the robot’s back/torso and push until you hear a firm click. Press the release button to verify it is locked.
- Connect the OEM charger to the robot’s charging port (likely on the back or base) and plug into a grounded outlet. The charger indicator should light up; charging time is not yet published, but expect 1.5–2 h for a full charge.
- Do not attempt to power on while charging unless the manual explicitly permits it. Some humanoid robots allow tethered operation; others require the charger to be disconnected first.
Step 3 — Powering On & First Boot
1. Ensure the robot is securely suspended from the overhead rig – all limbs should hang freely but be restrained enough that they cannot touch the ground.
2. Disconnect the charger.
3. Locate the main power button (likely on the rear shoulder or hip). Press and hold for 3–5 seconds until you hear beeps and see the status LEDs illuminate.
4. The robot will perform a Power‑On Self‑Test (POST): LEDs will cycle, fans may spin up, and the communicator panel (if present) might display a boot log. The process can take up to 2 minutes.
5. Once booted, the robot will enter a low‑power “standby” state. Do not attempt to move the joints manually; this can damage the servo brakes.
6. Proceed to network configuration (Step 4) before attempting any further wake‑up.
Step 4 — Network Configuration (Wi‑Fi vs Ethernet)
AgiBot has not yet published the exact network topology of the A2, but experience with other humanoids (Unitree G1, Boston Dynamics Spot, Tesla Optimus) suggests a wired Ethernet approach will be most reliable for initial setup.
Wired (Ethernet) — recommended
- Connect an Ethernet cable from your laptop directly to the robot’s designated maintenance port (likely on the head or torso).
- The robot’s onboard computer will have a static IP, factory‑set. AgiBot will provide this in the documentation. If unknown, try scanning the 192.168.1.0/24 or 10.0.0.0/24 subnet with an IP scanner.
- Set your laptop’s Ethernet adapter to a static IP on the same subnet, avoiding the robot’s address. For example, if the robot uses 10.0.0.10, set your PC to 10.0.0.100.
- Ping the robot’s IP to confirm connectivity.
Wireless (Wi‑Fi) – for later, non‑critical use
The A2 likely supports Wi‑Fi for remote control via the companion app. However, during setup, Wi‑Fi can introduce latency and dropouts. Use it only after you’ve completed firmware updates and calibration.
| Method | Reliability | Bandwidth | Best use case |
|---|---|---|---|
| Ethernet | Very high | 1 Gbps | Firmware update, SDK upload, first‑boot calibration |
| Wi‑Fi (5 GHz) | Medium | Up to 300 Mbps | App control, telemetry streaming (after initial setup) |
Important: Never connect the robot to an insecure home network without segmenting it (VLAN or separate SSID). An unpatched robot can be a target for network‑based attacks, especially before official security guidelines are released.
Step 5 — App / Remote Control Binding
AgiBot may provide a smartphone app (Android/iOS) for basic remote control, parameter tuning, and status monitoring. While the app’s exact name is not yet confirmed, the setup flow typically goes like this:
- Download the app from the Google Play Store or Apple App Store (search “AgiBot” or follow the QR code in the manual).
- Turn on Bluetooth on your phone and stand within 3 m of the robot.
- Open the app; it should discover the robot automatically (it may appear as “A2‑XXXX”).
- Select the robot and enter the binding code (often printed on a sticker inside the battery bay or on the shipment label).
- Once bound, the app will display battery status, joint angles, and allow basic commands such as Stand / Walk / E‑stop.
If the robot includes a physical remote control (similar to Unitree’s gamepad), pair it via Bluetooth using the instructions provided.
Step 6 — Firmware Update & Security Hardening
Because the A2 is a pre‑order product, the first shipping firmware will almost certainly have updates available by the time you receive it. Always install the latest stable release before performing any serious movements.
- Visit the official AgiBot developer portal (check support.agibot.com or similar; URL will be in the documentation).
- Download the firmware image and verification checksum.
- With the robot connected via Ethernet (Step 4), use the updater tool (likely a command‑line utility or button in the companion app) to flash the new firmware. The robot will reboot automatically.
- After the update, immediately change any default passwords. The robot may have default SSH credentials (e.g., root / root or agibot / 123456); change them to a strong, unique passphrase.
- Disable any unnecessary services. In particular, if the robot supports Bluetooth Low‑Energy (BLE) provisioning, turn it off when not actively pairing – BLE can be a vector for command injection, as seen in similar humanoid platforms. Until AgiBot publishes a security hardening guide, apply these generic precautions:
- Segment the robot onto its own wireless network (VLAN or guest SSID).
- Keep the robot disconnected from the internet when not downloading updates.
- Enable the robot’s built‑in firewall if available (usually iptables‑based).
No CVEs have been published for the AgiBot A2 as of July 2026, but the robotics field moves fast – monitor the manufacturer’s security bulletins regularly.
Step 7 — SDK / ROS2 Setup (Advanced)
For researchers and developers who want to write custom control software, AgiBot will offer a software development kit (SDK). Based on their previous platforms, you can expect:
- A C++ SDK with Python bindings (using pybind11).
- ROS2 support (likely Humble or Foxy), allowing integration with Gazebo, MoveIt2, and RViz.
- An IDL (Interface Definition Language) that defines the robot’s low‑level motor commands.
Anticipated Installation Steps
While the exact repository and commands aren’t public yet, a typical advanced setup will look like this:
# After receiving the A2, download the SDK from AgiBot’s Git server
git clone https://github.com/Agibot/agibot_sdk.git
cd agibot_sdk
mkdir build && cd build
cmake .. -DCMAKE_INSTALL_PREFIX=/opt/agibot_robotics
sudo make install

# For Python
pip3 install -e .

# For ROS2 support (tentative)
git clone https://github.com/Agibot/agibot_ros2.git
colcon build --symlink-install
When official documentation arrives, these steps will be refined. The most common pain point in humanoid SDKs is setting the correct network interface for DDS (CycloneDDS or Fast‑RTPS). You will likely need to export an environment variable such as CYCLONEDDS_URI or configure the interface name in a YAML file.
Step 8 — Calibration & First Movement
With the robot still suspended and all safety measures in place, you can now initiate the calibration routine:
- Via the app or terminal, send the “CalibrateAll” command. The robot will slowly move each joint to its zero position, detect encoder positions, and verify torque sensors.
- Watch for any unusual sounds or jerky motions; the spotter must keep a hand on the e‑stop.
- Once calibration completes (typically 3–5 minutes), the robot will indicate “READY” on the app or LED panel.
- With the rig still bearing the robot’s weight, issue a low‑speed “Stand” command. The A2 will rise to a stable bipedal stance. Confirm that the feet are flat on the mat and the arms are in a neutral pose.
- If standing is stable, issue a “Walk” command at the lowest speed setting (≤0.5 m/s). Observe the gait for a few steps, then stop.
- After a successful walk, you can carefully remove the suspension rig – but only if the robot can maintain balance unaided. Continue to keep the exclusion zone active.
Defining Success: Minimum / Full / Advanced
| Tier | Definition |
|---|---|
| Minimum viable | Robot powers on, connects to the app (or remote), and stands safely while suspended. |
| Full operational | Networked to your PC, latest firmware installed, calibration passed, walks reliably at low speed indoors, e‑stop tested. |
| Advanced | SDK/ROS2 installed, custom code runs (e.g., teleoperation or autonomous navigation), and the robot can operate without the suspension rig. |
Common Setup Mistakes & Fixes
Even though the A2 is not yet shipping, we can anticipate several failure points common to humanoid robots. When you receive your unit, watch out for these:
| Mistake | Symptom | Fix |
|---|---|---|
| 1. Forgetting the suspension rig | Robot flops over, actuators may be damaged | Always hang the robot before first power‑on or after a firmware reset. |
| 2. Using a carpeted floor | Slipping, unstable walking, foot drag | Place a flat rubber mat; avoid loose‑pile carpets. |
| 3. Incorrect subnet on laptop | Cannot ping robot, SSH times out | Set your PC to a static IP on the robot’s subnet (details to be provided by AgiBot). |
| 4. Charging while powered on (if prohibited) | Robot won’t boot, or charger error | Disconnect charger before pressing power; consult manual. |
| 5. Skipping firmware update | Known bugs, missing features, potential security holes | Update to latest stable release before any movement test. |
| 6. Not changing default passwords | Unauthorised SSH access, possible network hijack | Change root/agibot credentials immediately after first boot. |
| 7. Running SDK commands without verifying DDS interface name | “channel factory init error”, commands ignored | Set the correct interface (e.g., enp0s3) in the CycloneDDS config file. |
| 8. Attempting high‑speed operation indoors | Collision risk, loss of balance | Limit speed to 1 m/s in home settings; keep speed dial low. |
| 9. Ignoring e‑stop test | No quick way to disable robot in emergency | Test e‑stop function before every session; keep it within arm’s reach. |
| 10. Plugging into a daisy‑chained power strip | Voltage drop, charger fault | Use a dedicated, grounded outlet directly. |
Frequently Asked Questions
- How much does the AgiBot A2 cost?
- The AgiBot A2 is priced at $100,000 new, from the manufacturer. Pre‑orders are accepted through AgiBot and select distributors. Currently, there are no live used‑unit listings on BotMarket; check the Robot Database page for updates on resale availability.
- What are the robot’s key specs?
- The AgiBot A2 stands 1.69 m tall, weighs 55 kg, and has 49 degrees of freedom. It can handle a payload of 80 kg, achieve a top speed of 3.3 m/s, and run for up to 5 hours on a full charge.
- Is the AgiBot A2 available for immediate purchase?
- No. As of mid‑2026, the A2 is in pre‑order phase. First deliveries are expected between late 2025 and 2026. You can reserve a unit through the official AgiBot website.
- How do I set up the AgiBot A2 at home?
- Follow the steps in this guide: unbox, charge the battery, connect via Ethernet, update firmware, calibrate while suspended, and test low‑speed walking. Always work in a 4 m × 4 m clear zone with an e‑stop handy. Exact IPs and button combos will be detailed in the manual that ships with your robot.
- What operating system and SDK does the A2 use?
- AgiBot is expected to ship the robot with a Linux‑based OS (likely Ubuntu) and provide a C++/Python SDK with ROS2 support. Check the developer portal at agibot.com for the latest tools once your unit arrives.
- Can I walk the robot at full speed indoors?
- No. The maximum speed of 3.3 m/s is designed for open, controlled environments. For home setup, limit speed to 1 m/s to avoid collisions and loss of balance.
- Does the AgiBot A2 have an emergency stop?
- Yes. The robot will include a physical e‑stop button. You can also cut power via the charger disconnect or the companion app. Test all e‑stop mechanisms before any motion test.
- Is the robot safe around people?
- The AgiBot A2 is not certified as inherently collaborative (ISO 10218‑1). It weighs 55 kg and moves quickly, so strict exclusion zones and a trained spotter are mandatory. Never allow untrained individuals near the operating space.
- How do I update the firmware?
- After connecting the A2 to your PC via Ethernet, use the updater utility provided by AgiBot. Always install the latest stable firmware before calibration. Keep an eye on the manufacturer’s website for security patches.
- Where can I buy compatible accessories?
- Accessories like charger replacements, suspension rigs, and safety mats are often available through BotMarket’s accessory listings. See the Robot Database for recommended items once the A2 enters full distribution.
Komentari