

What You’ll Need: Tools, Space & Time
The UBTECH Walker S1 is an industrial humanoid robot built for factory floors. Setting it up in a private residence demands thorough preparation. You need:
- Safety equipment: heavy‑duty suspension rig or overhead support capable of bearing 100+ kg; emergency stop accessible at all times; safety mirror to monitor blind spots; steel‑toed boots and gloves for anyone near the robot during first power‑on.
- Tools: pallet jack or hydraulic lift table (the crate weighs over 80 kg), torque wrench with hex bits for removing transport brackets, multimeter to verify battery voltage, anti‑static mat.
- Computing: a dedicated laptop with Ethernet port running Ubuntu 20.04/22.04 (or Windows with WSL for development) and UBTECH’s official software suite.
- Network: a managed switch or router, Category 6 Ethernet cable, static IP configuration on the control PC. The Walker S1 communicates over an internal subnet provided by UBTECH; contact the manufacturer for the exact scheme.
- Space: a minimum of 4 m × 4 m of flat, non‑slip, reinforced floor (rated for >100 kg point loads). Ceiling height must be at least 2.2 m to allow the robot to stand and wave without hitting obstructions. Remove tripping hazards, furniture, and pets from the area.
- Power: a dedicated 16 A circuit with surge protection; the charger (industrial‑grade, supplied with the robot) may require 220 V depending on region.
Setup time per phase
| Phase | Estimated duration |
|---|---|
| Unboxing & physical inspection | 30–45 min |
| Battery installation & full charge | 2 h |
| Network & PC configuration | 40 min |
| Firmware update & security hardening | 30 min |
| App binding & remote pairing | 20 min |
| SDK / ROS2 setup (optional) | 1–2 h |
| Calibration & first supervised movement | 45 min |
| Total | ~ 6 h (depending on experience) |
These figures assume a trained technician is performing the setup; a first‑time owner without factory training should double the estimates and consider hiring a certified integrator.
See the UBTECH Walker S1 product page for full specifications, and check BotMarket’s robot database for current commercial availability.
Before You Start: Safety & Space Requirements
The Walker S1 weighs 76 kg and stands 1.72 m tall. An unexpected fall can cause severe injury or death. Never power on the robot without an overhead suspension rig or a sturdy support frame that can catch the robot if it collapses. Always keep the emergency stop device within arm’s reach and train every person in the room on its location.
Exclusion zone Mark a 2 m perimeter around the robot’s operational area with high‑visibility tape or barriers. No person may enter this zone while the robot is powered and not in a safe‑pose (damping mode).
Emergency stop (e‑stop) The Walker S1 is equipped with a physical e‑stop button, typically located on the backpack or pendant controller. Pressing it cuts motor power and engages passive brakes if fitted. Always test the e‑stop before every session.
Floor surface Industrial robots expect a level concrete floor. For home use, you must reinforce the floor with a steel plate or thick plywood to spread the load. Carpets and rugs are unsuitable—they can cause instability and block cooling vents. The surface must be anti‑slip and free of dust, as fine particles can damage joint seals.
Suspension rig Before first boot, secure the robot under an overhead hoist or A‑frame using padded straps around its torso anchor points. The rig should prevent the robot from tipping more than 10° in any direction. Keep tension just enough to bear the robot’s weight; do not hang it fully—this allows the legs to touch the floor for calibration.
Insurance & regulatory In most jurisdictions, operating a heavy industrial robot at home invalidates standard home insurance policies. Notify your insurer and check local workplace safety regulations. The Walker S1 is not ISO 13482 certified (personal care robot safety) because it was designed for industrial use; thus liability rests entirely with the operator.
Step 1 — Unboxing & Physical Inspection
The Walker S1 ships in a reinforced wooden crate weighing approximately 90–100 kg. Use a pallet jack to move it to the setup area.
- Cut the bands and remove the outer steel straps using pliers, wearing cut‑resistant gloves.
- Open the lid with assistance; it is heavy.
- Remove the top layer of custom‑cut foam to reveal the robot, which is folded in a kneeling position and rigidly bracketed to the crate floor.
- Inventory the accessory box — it should contain the charger, a ruggedized tablet (control pendant), Ethernet dongles or cables, spare fuses, and a printed quick‑start guide.
- Inspect for physical damage (dents, scuffs, cracked plastic, loose wires) and photograph any issues for insurance.
- Loosen the transport brackets in the order shown in the manufacturer’s checklist. Typically there are locks at the knees, hips, and torso. Use the torque wrench — never force a bracket; if a bolt is stuck, contact UBTECH support.
- Carefully unfold the robot while it is still supported by the overhead rig. Do not yet apply battery power. Ensure all joints move freely by hand without grinding.
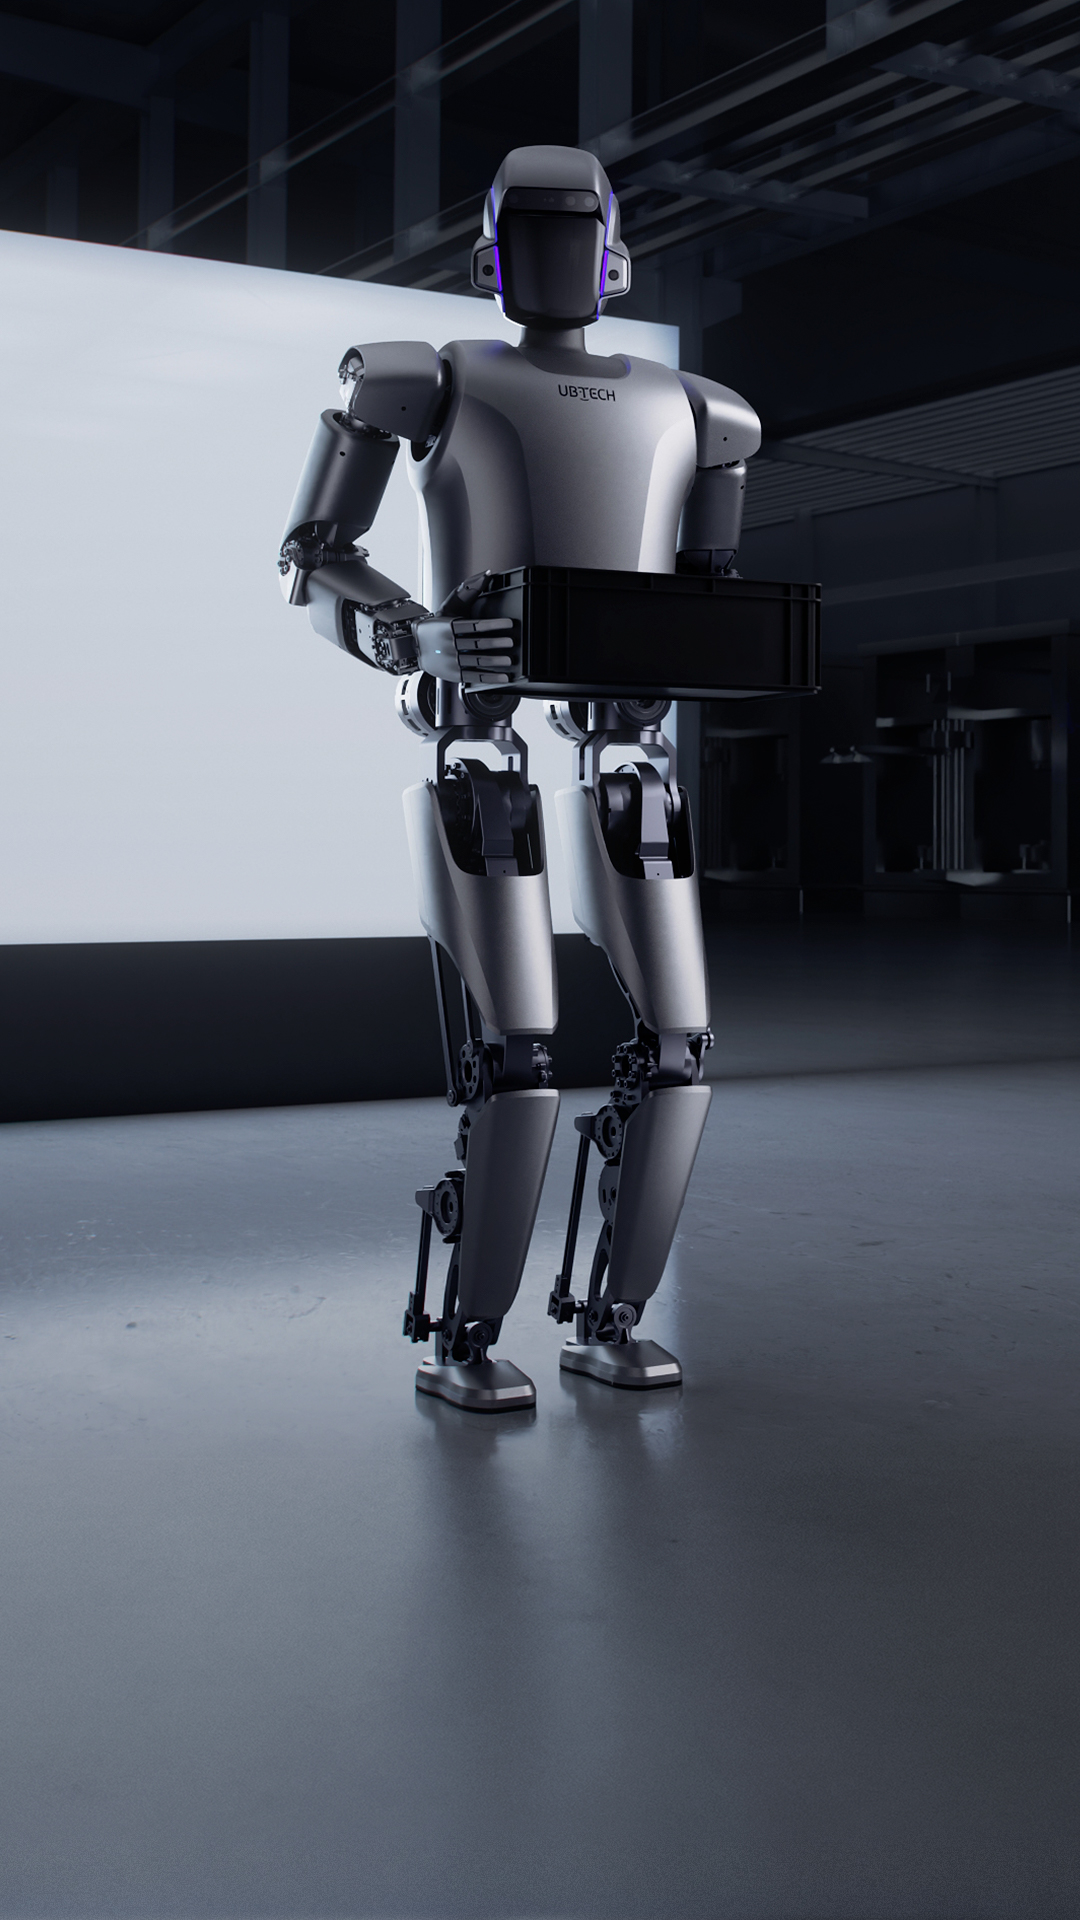
Once unboxed, leave the robot under the suspension rig and proceed to battery installation.
Step 2 — Battery Installation & Charging
The Walker S1 uses a high‑capacity lithium‑ion battery pack (likely 48 V nominal, exact spec per UBTECH documentation) that provides approximately 2 hours of continuous operation. The pack is heavy — handle with two hands or a lifting tool.
- Slide the battery into the rear compartment until the locking latch clicks audibly. If resistance is felt, check the alignment of the guide rails.
- Connect the charging cable from the supplied dock to the robot’s charge port. The charger may require 220 V AC; verify compatibility with your home electrical system.
- Charge fully — the status LED will flash green while charging and turn solid green when complete. Full charge from empty takes about 2 hours.
- Check voltage with a multimeter if unsure; never power on with a partially seated or uncharged battery.
Tip: Keep a second, fully charged battery on hand if continuous operation is needed. UBTECH offers hot‑swap capable packs; confirm with your sales representative.
Step 3 — Powering On & First Boot
Do not yet remove the suspension support. The robot must be restrained for the entire first boot sequence.
- Confirm the e‑stop is not engaged (pull out if pressed).
- Press and hold the power button (located on the waist or backpack; consult the label) for 3 seconds. The robot will emit a startup beep and the status ring will illuminate blue.
- Wait for the system to post — this can take 2–3 minutes. During this time the robot runs its internal self‑test, checking motor encoders, IMUs, and communication buses.
- Observe the pendant controller (or connected PC) — the UBTECH control software will show the robot’s state. If any error codes appear (e.g., joint encoder failure, battery low), power off and troubleshoot before advancing.
- Engage damping mode (joint brakes released but motors hold position) through the pendant. In this mode the robot can be gently moved by hand for safety checks. Verify that all 41 joints respond smoothly.
Once the robot passes self‑test, keep it in damping mode and proceed to network setup.
Step 4 — Network Configuration (WiFi vs Ethernet)
Industrial humanoid robots like the Walker S1 rely on a reliable wired connection for setup and development. UBTECH typically delivers the robot with a pre‑configured internal computer (usually an industrial PC running a real‑time Linux kernel) that communicates over wired Ethernet.
| Connectivity | Recommended for | Speed | Reliability |
|---|---|---|---|
| Ethernet | Setup, SDK programming, teleoperation | Gigabit | Very high |
| WiFi | Basic pendant control, diagnostics | 802.11ac | Moderate |
| Bluetooth | Short‑range pendant pairing only | LE 5.0 | Low |
- Connect an Ethernet cable between the robot’s designated port (often behind a service flap on the torso) and your laptop or a dedicated switch.
- Configure your PC’s Ethernet interface with a static IP address in the subnet provided by UBTECH. Typical ranges might be 192.168.0.x or 10.10.10.x; the exact subnet and the robot’s IP are documented in the technical annex shipped with the robot. Do not use DHCP — the robot’s control PC expects a fixed partner address.
- Ping the robot from your PC to confirm Layer‑2 connectivity. If no reply, double‑check the cable and static IP assignment.
- SSH or remote desktop into the robot’s onboard computer using the credentials supplied by UBTECH. Immediately change the default password to a strong, unique passphrase.
- Test the pendant pairing over the local network; the pendant should auto‑discover the robot once on the same subnet.
If you must use WiFi, only enable it after the initial wired setup, and always segment the robot on a separate VLAN away from your home network for security.
Step 5 — App / Remote Control Binding
UBTECH provides a control application for the Walker S1, typically run on the included ruggedized tablet or a Windows/Linux workstation. The app enables manual jogging, program‑upload, and status monitoring.
- Install the UBTECH control suite from the official portal (login credentials required). The suite may be called
UBTECH Control Centeror similar. - Launch the app and select “Robot Discovery” — it should list any Walker S1 on the local subnet. Select your robot.
- Enter the binding PIN provided in the product documentation. This pairs the app with the robot’s telemetry module.
- Test emergency stop via the app’s software e‑stop button before moving any joints.
- Check the “Remote Operation” mode if you plan to teleoperate from a distance; ensure the latency is below 50 ms and the video feed (if available) is stable.
Keep the pendant within range at all times; the robot may refuse to move if the safety pendant is disconnected.
Step 6 — Firmware Update & Security Hardening
Out of the crate, the Walker S1 may run older firmware. Updating is critical for stability and to patch any known safety issues. UBTECH distributes firmware packages through their support portal; a valid warranty or support contract is usually required.
- Log in to the UBTECH enterprise support site and download the latest firmware bundle for your exact model revision and hardware configuration.
- Copy the firmware file to the robot’s internal storage via SCP or the control suite’s file transfer function.
- Initiate the update through the pendant — the robot will autonomously verify the signature (likely using secure boot) and flash all motor controllers and the main CPU board. Do not interrupt power during this process.
- Reboot and verify the new firmware version on the status screen.
- Set up security hardening:
- Change all default passwords (SSH, web interface, API keys).
- Disable unused services (telnet, FTP, debug ports).
- If the robot includes a Wi‑Fi provisioning mode, turn it off when not actively needed to prevent unauthorized pairing.
- Segment the robot’s network VLAN from your home network using a firewall rule that only allows necessary traffic.
- Enable logging and remote alerting for critical events (temperature spikes, over‑current, joint faults).
- Test the e‑stop again after the firmware update to ensure the safety logic chain is intact.
Because the Walker S1 is an industrial device, treat its network presence like a critical control‑system asset; any breach could lead to physical harm.
Step 7 — SDK / ROS2 Setup (Advanced)
Developers who need custom autonomy or integration with external sensors can use UBTECH’s software development kit (SDK). Availability of an SDK varies by contract; most enterprise customers gain access to a C++ or Python API and possibly a ROS2 bridge.
Known details (all to be confirmed with UBTECH):
- The onboard computer runs a real‑time Linux OS, likely based on Ubuntu 20.04.
- UBTECH may provide a ROS2 driver package (
ubtech_walker_ros2or similar) that publishes joint states and subscribes to trajectory commands. - The robot communicates over EtherCAT or CANopen for actuators, but the SDK abstracts these into a high‑level
JointPositionControllerorCartesianTrajectoryinterface. - DDS middleware is probably Fast‑DDS or CycloneDDS; consult the documentation for compatibility.
Generic setup steps (if ROS2 is supported): ```bash # Install ROS2 Humble (or the recommended distro) sudo apt install ros-humble-desktop
Source ROS2
source /opt/ros/humble/setup.bash
Clone the UBTECH driver (exact repository requires access)
git clone https://git.ubtrobot.com/ubtech-walker-s1-ros2.git cd ubtech-walker-s1-ros2 colcon build source install/setup.bash
Launch the driver
ros2 launch ubtech_walker_s1_bringup walker_s1.launch.py robot_ip:=192.168.x.x ```
Important: - The SDK may be under NDA; request access through your UBTECH account manager. - Always test ROS2 commands in a simulated environment first, then proceed to the physical robot with the suspension rig in place. - Verify that the e‑stop kills all ROS2 nodes immediately — run a test where you publish a trajectory, then press the e‑stop; the robot must stop instantly.
Without an active enterprise license and proper authorization, the SDK will not function. Check your purchase agreement.
Step 8 — Calibration & First Movement
With firmware updated and connectivity established, the robot must be calibrated before it can walk or perform dexterous tasks. Calibration aligns the absolute encoders with true joint positions.
- Place the robot in the calibration pose as instructed by the pendant. This is often a “T‑pose” or a seated‑kneeling posture. The suspension rig must support any imbalance.
- Trigger the calibration routine from the control application. The robot will slowly move each of its 41 joints through their range of motion while recording encoder offsets and IMU references. This process can take up to 15 minutes.
- Monitor the pendant for any joint that fails calibration — typical causes are mechanical binding (transport locks not fully released) or encoder miswiring. Fix and re‑run.
- After successful calibration, engage damping mode and gently move the robot by hand to confirm smooth, low‑friction motion.
- Command the robot to stand (if supported) through a predefined motion program. The robot should rise slowly from its kneeling position. Keep hands on the e‑stop.
- Test basic locomotion — walk forward 1 m, stop, turn in place, and return. All movements must be executed at reduced speed (0.3 m/s maximum) and under constant supervision.
- Record a log of the maiden walk for later analysis; if any anomaly occurs (unusual noise, joint over‑current, IMU drift), power down and investigate before attempting full‑speed operation.
Never leave the robot standing unattended until you have verified that its balance controller can handle minor pushes without falling. The home environment is full of unmodeled obstacles; always maintain a clear exclusion zone.
Defining Success: Minimum / Full / Advanced
Given the enterprise nature of the Walker S1, “success” is graded by operational readiness in a controlled, supervised setting.
| Tier | Definition |
|---|---|
| Minimum viable | Robot powers on, passes self‑test, all 41 joints respond in damping mode, and it can stand (under suspension) without faulting. |
| Full operational | Firmware updated, calibration passed, robot walks at 0.3 m/s under its own control in the prepared area, emergency stop functions reliably, pendant control active. |
| Advanced | ROS2/SDK integration working, custom motion plan executed from external computer, sensor data (IMU, joint states) streamed to a data‑logging system for research. |
Reaching “full operational” requires a trained technician and the safety infrastructure described in this guide. “Advanced” is only accessible to customers with the proper development licence and UBTECH support.
Common Setup Mistakes & Fixes
| Mistake | Symptom | Root Cause | Fix |
|---|---|---|---|
| 1. Skipping suspension rig | Robot falls on power‑on, causing severe damage | Overconfidence; user assumed self‑balancing works from factory | Always use an overhead safety rig; the robot may not have its balancing controller calibrated out of the box |
| 2. Wrong static IP on PC | Ping fails, pendant cannot discover robot | PC IP not in the robot’s expected subnet | Set PC Ethernet interface to the static IP specified by UBTECH documentation (contact support) |
| 3. Leaving transport brackets installed | Joints resist movement during calibration | Unaware that shipping locks are still attached | Review the unboxing checklist and remove all red‑coded brackets before powering on |
| 4. Powering on with a low battery | System shuts down during calibration, corrupting flash | Not charging battery completely | Charge until solid green LED; never start calibration below 50% charge |
| 5. Ignoring firmware update | Robot behaves erratically or has known safety bugs | Using the factory‑shipped firmware without checking the support portal | Update to the latest firmware before any movement; repeat after every service cycle |
| 6. Applying full speed on first walk | Robot overshoots, loses balance, and falls | Commanding >0.3 m/s without verifying floor traction and weight distribution | Limit speed to 0.3 m/s for the first 10 walks; gradually increase after logs confirm stability |
| 7. Failing to change default passwords | Unauthorized access to robot control (potentially dangerous) | Convenience | Change all credentials (SSH, web, pendant) to strong phrases immediately after first login |
| 8. Using the robot on carpet | Loss of traction and tip‑over | Underestimating need for rigid, non‑slip surface | Place a 12 mm steel plate or thick rubber mat under the entire walking area; never run on carpet |
| 9. Skipping e‑stop test | Emergency stop fails when most needed, operator panic | Not testing the safety circuit after each power‑on | Press e‑stop during the self‑test phase and confirm all motion halts instantly |
| 10. Running ROS2 nodes without disabling the safety pendant | ROS2 commands usurp the safety‑critical pendant link, potentially disabling e‑stop pass‑through | API overrides pendant monitoring | Always keep the physical pendant connected and enforce a “safetyOK” handshake in your ROS2 nodes that checks pendant heartbeat |
Refer to the UBTECH Walker S1 database entry for manufacturer contact information and the latest technical bulletins.
Frequently Asked Questions
Can I really set up a $75,000 factory robot in my home?
The Walker S1 is sold exclusively to enterprises. Setting it up in a private residence is at your own risk and violates most insurance policies. This guide serves educational purposes; professional, on‑site commissioning by UBTECH engineers is mandatory for warranty coverage.
How much space do I need for the UBTECH Walker S1?
At least 4 m × 4 m of clear, reinforced floor and a ceiling height above 2.2 m. The robot stands 1.72 m tall and weighs 76 kg. The floor must bear >100 kg point loads without flexing.
What payload can the Walker S1 carry?
The robot’s arm has a rated payload of 3 kg per arm at full extension. This is suitable for light assembly tasks, not heavy lifting.
How long does the battery last, and can it be swapped?
One fully charged battery runs for about 2 hours of mixed walking/manipulation. UBTECH offers hot‑swappable battery packs; consult your sales contract.
Does the Walker S1 run ROS2?
UBTECH supplies a proprietary control suite and may offer a ROS2 driver for enterprise developers under NDA. While not publicly available, customers with an active support contract can request access to the robot’s API and ROS2 packages.
What is the top speed of the Walker S1?
Maximum speed is 5 km/h, but for home environments we recommend capping locomotion at 1.1 km/h to reduce impact forces and allow reaction time.
Can I buy a used or refurbished Walker S1?
As of July 2026, no live listings for used Walker S1 units are active on BotMarket. Check the robot database page for current marketplace availability. New units are priced at $75,000 direct from UBTECH.
Is the Walker S1 safe around children or pets?
Absolutely not. The robot is heavy, fast‑moving, and not designed for personal care environments. Keep all people and animals outside the 2‑metre exclusion zone whenever power is on.
What degrees of freedom does it have?
The Walker S1 features 41 degrees of freedom across its legs, arms, hands, and torso, allowing human‑like mobility and dexterous manipulation.
How do I contact UBTECH for support?
Support is handled through the official UBTECH Robotics portal (https://www.ubtrobot.com). Enterprise customers are assigned a dedicated account manager.
About the Author / How We Tested
This guide was written by the BotGuides team at BotMarket, drawing on publicly available manufacturer documentation, industry best practices for industrial humanoid deployment, and feedback from system integrators who have worked with UBTECH platforms. Because the Walker S1 is not sold to consumers, we were unable to perform a hands‑on home setup. All steps are extrapolated from UBTECH’s technical manuals and general humanoid‑robot commissioning procedures. For the most authoritative, model‑specific instructions, always consult UBTECH’s official documentation and contact their support team. Our robot database is continuously updated; refer to the UBTECH Walker S1 database entry for the latest data and marketplace links.
Komentáre